Stamp it - Apply a full-screen watermark to an image
About
A lightweight MCP component for adding text watermarks to pictures.
Details
- Author
- LiuHao-1443
- Downloads
- 136
- Categories
- Media
Jump to
- Dual watermark modes (text and image)
- Smart adaptive color selection based on brightness
- Tilted watermark effects with customizable angle
- Multi-language support (Chinese, English, Japanese, Korean)
- High-density coverage with staggered arrangement
- Auto-save in the same directory as original image
- Supports JPEG, PNG, GIF, BMP, TIFF, WebP formats

Setting up with Highlight
This MCP is not yet compatible with Highlight’s one-click setup. However, you can still use it with Highlight by following these steps:
- Download and install Highlight from highlightai.com/download
- Navigate to the plugins tab and select "Add Custom Plugin"
-
Configure the plugin with the settings below
Plugin Name
Stamp it - Apply a full-screen watermark to an imageCommand (node, npx, python, etc.)Please refer to the README for specific instructions on how to obtain API keys or other required environment variables.
- Enable "Start Automatically" if you want the plugin to start when Highlight launches





From the repository
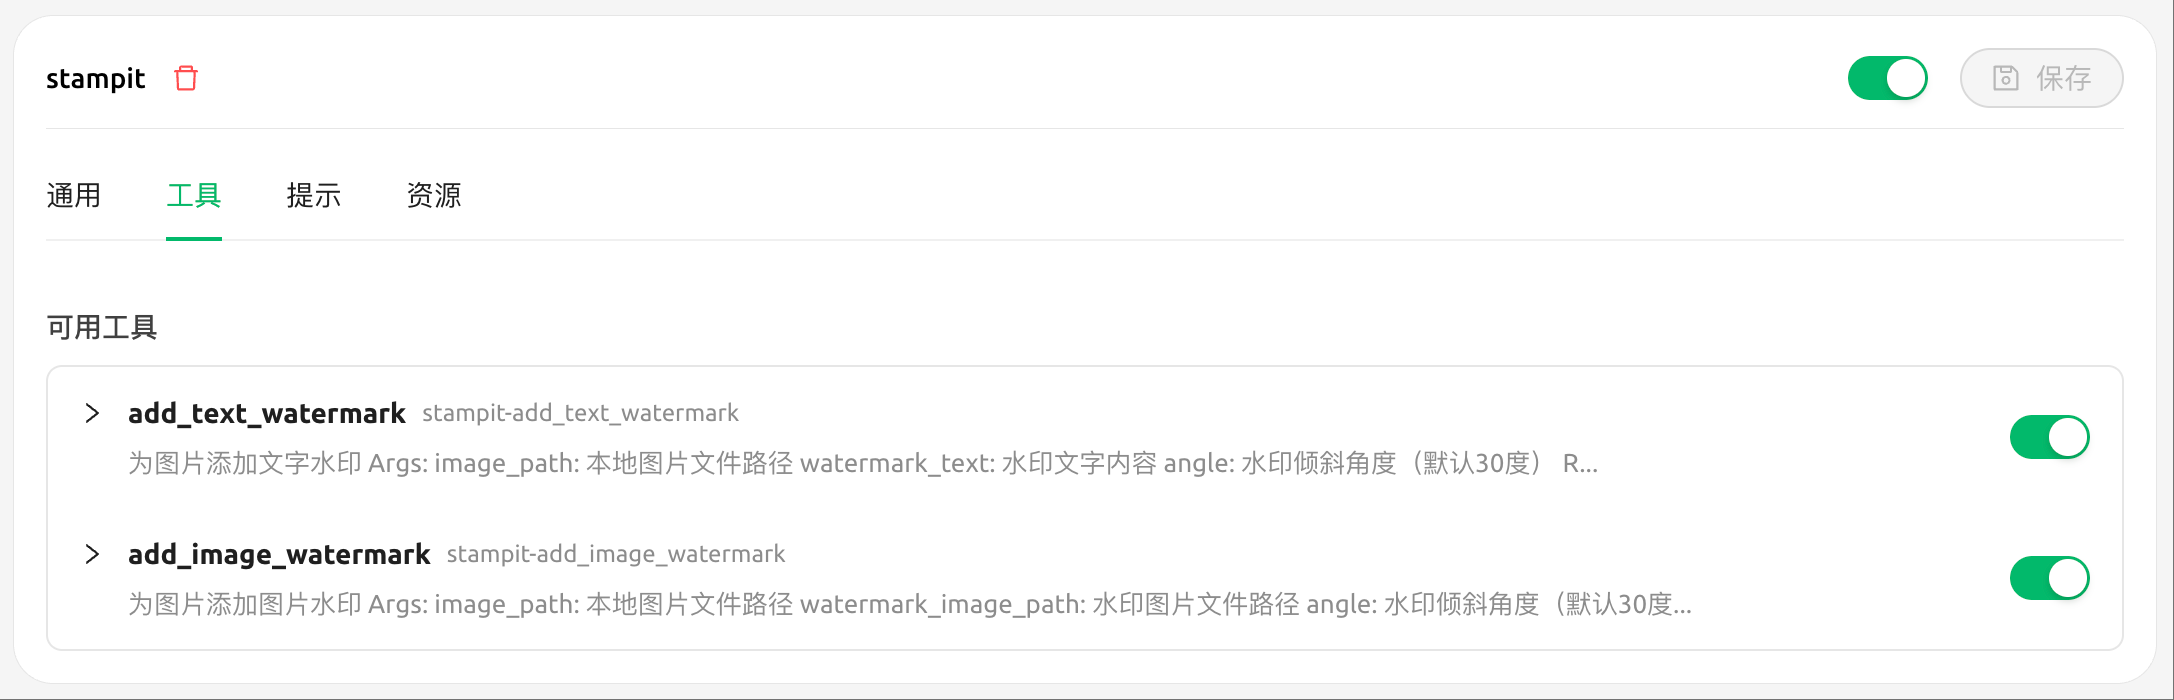
Configure the MCP server in a client like Cherry Studio or Cursor using the command uvx mcp-stampit, or run it standalone with python main.py. Two tools are available: add_text_watermark (takes image_path, watermark_text, optional angle) and add_image_watermark (takes image_path, watermark_image_path, optional angle).
Claude Desktop / Cursor
Paste into your MCP client config file to install this server.
{
    "mcpServers": {
        "stamp it - apply a full-screen watermark to an image": {
            "stampit": {
                "command": "uvx",
                "args": [
                    "mcp-stampit"
                ]
            }
        }
    }
}McpServers
{
    "stampit": {
        "command": "uvx",
        "args": [
            "mcp-stampit"
        ]
    }
}
🎯 Stamp it - Apply a full-screen watermark to an image
A professional image watermarking service built with FastMCP, supporting both text and image watermarks with intelligent color adaptation.
中文文档 | English
✨ Key Features
- 🖼️ Dual Watermark Modes: Support for both text and image watermarks
- 📂 Local File Processing: Professional local image file handling
- 🎨 Smart Adaptive Colors: Automatic color selection based on image brightness
- 📐 Tilted Watermark Effects: Customizable angle tilting (default 30° upward right)
- 🌍 Multi-language Support: Chinese, English, Japanese, Korean and more
- 🎯 High-density Coverage: Complete coverage of every corner with no gaps
- 💎 High Definition: BICUBIC resampling for smooth edges
- 📁 Smart Saving: Auto-save in the same directory as original image
- ⚡ Performance Optimized: Font caching, intelligent scaling, memory management
- 🛠️ Rich Format Support: Supports 7 common image formats
📖 Usage
MCP Client Configuration
Cherry Studio (Recommended)
1. Open Cherry Studio Settings
- Go to Settings → MCP Servers
- Click "Add Server"
2. Configure MCP Server
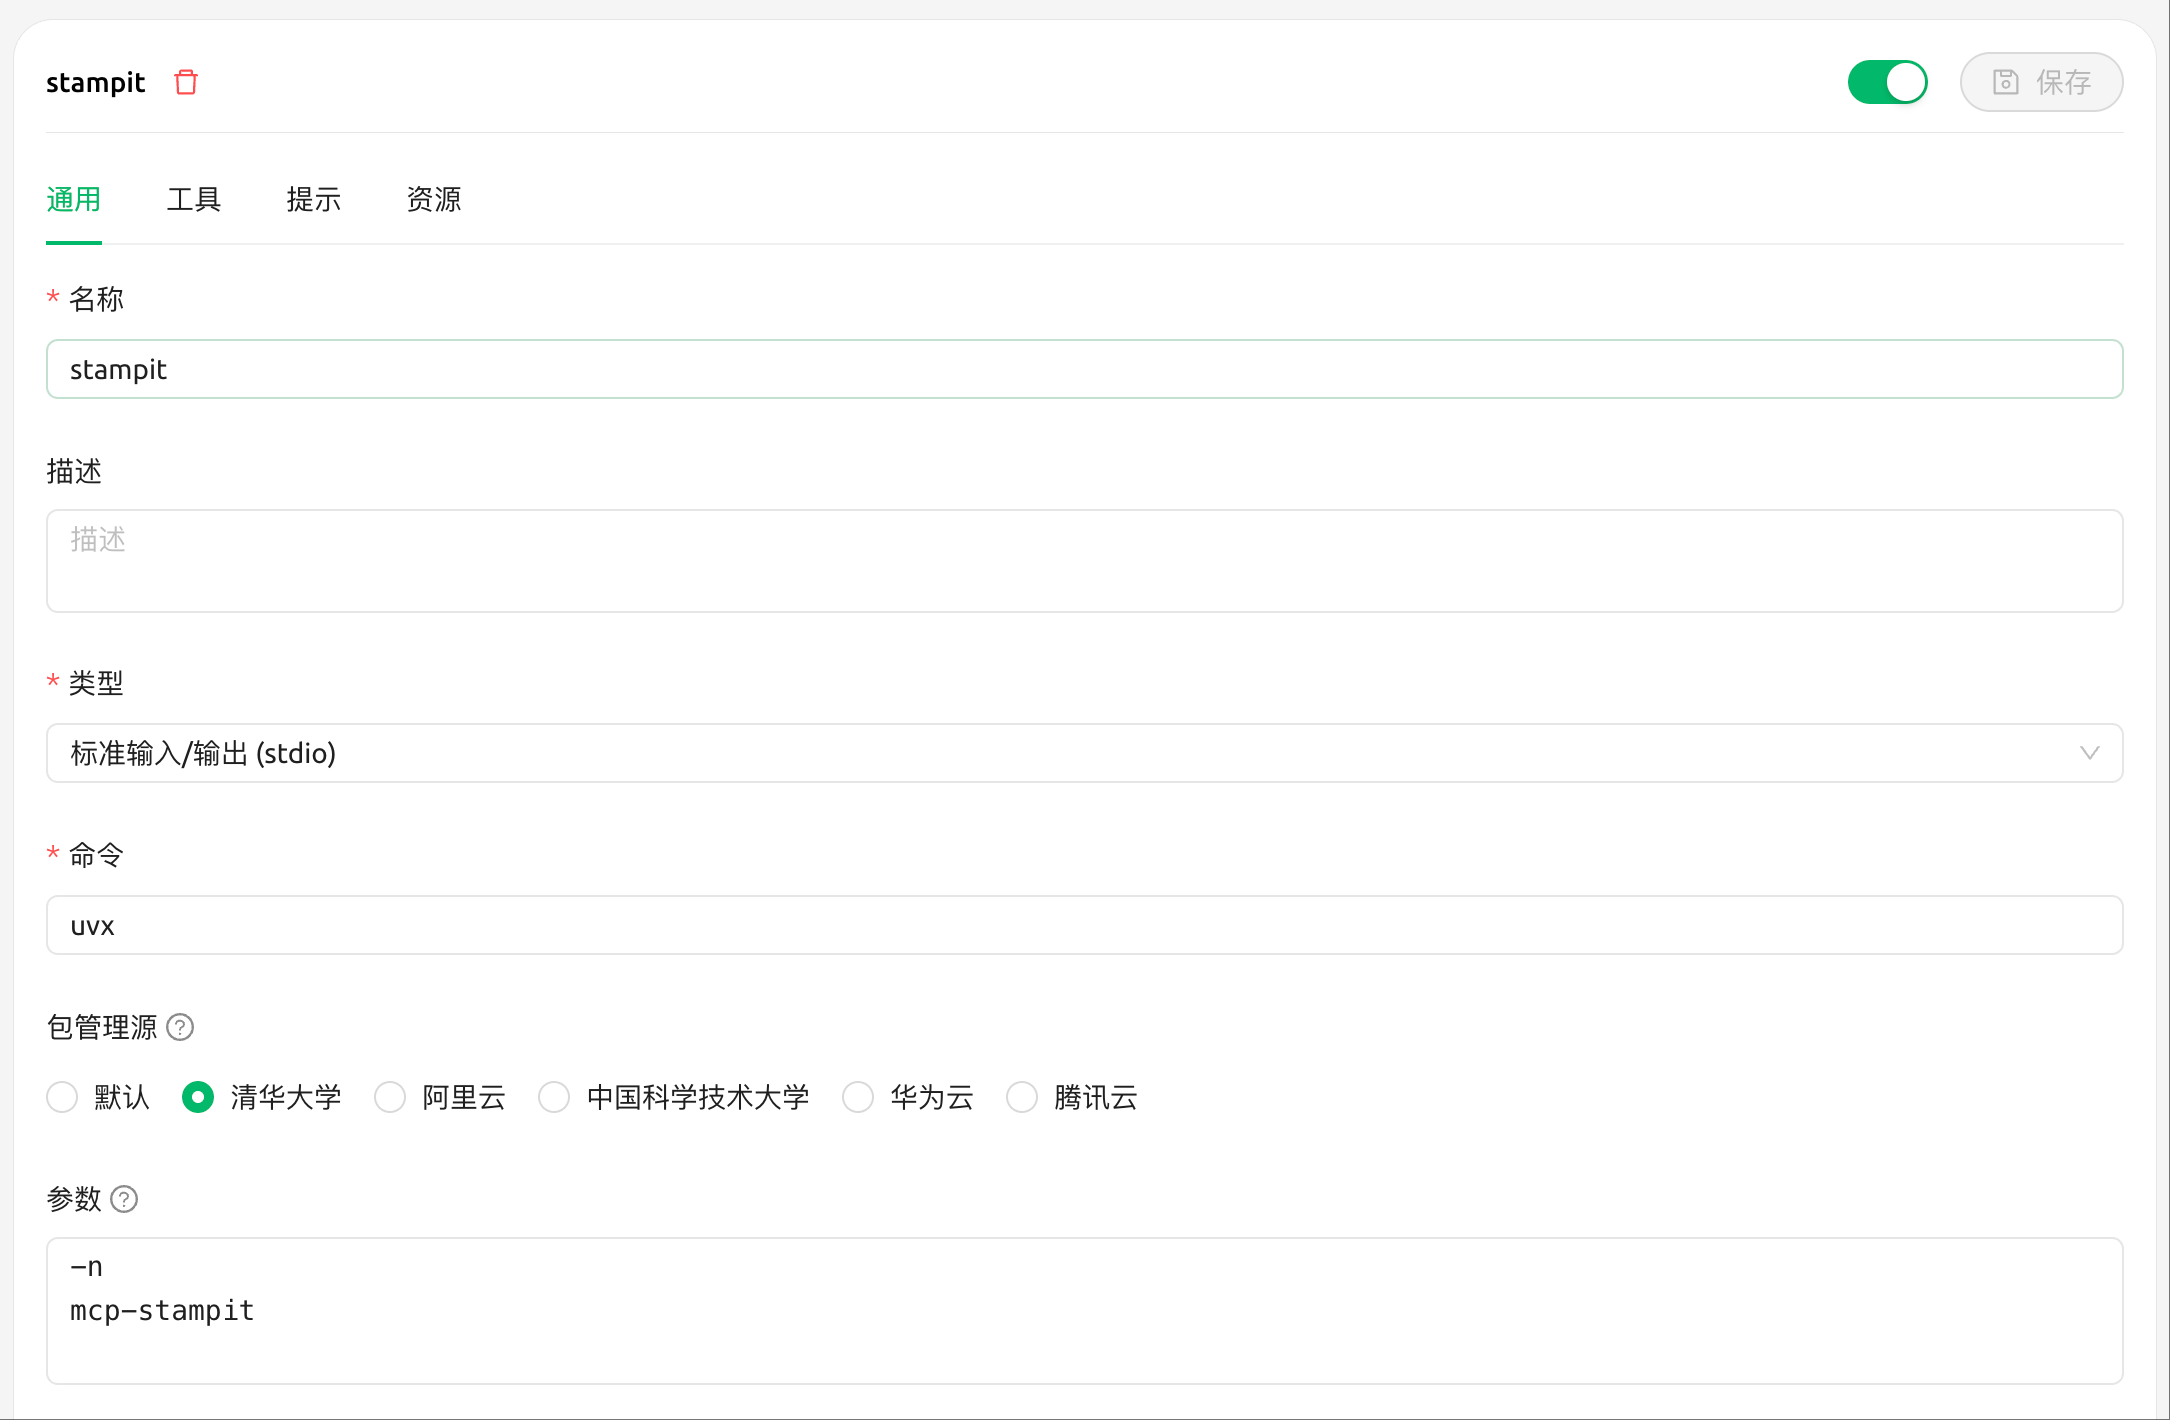
3. Save and Connect
- Click "Save" to add the server
- The server will automatically connect
- You can now use the watermark tools in Cherry Studio
Cursor
1. Open Cursor Settings
- Use shortcut Cmd+, (Mac) or Ctrl+, (Windows/Linux)
- Or click Settings → Preferences
2. Configure MCP Server
- Find "MCP Servers" configuration option
- Add the following configuration:
{
  "mcpServers": {
    "stampit": {
      "command": "uvx",
      "args": [
        "mcp-stampit"
      ]
    }
  }
}
3. Save and Restart
- Save the configuration file
- Restart Cursor for changes to take effect
- You can now use the watermark tools in Cursor
📦 Preview
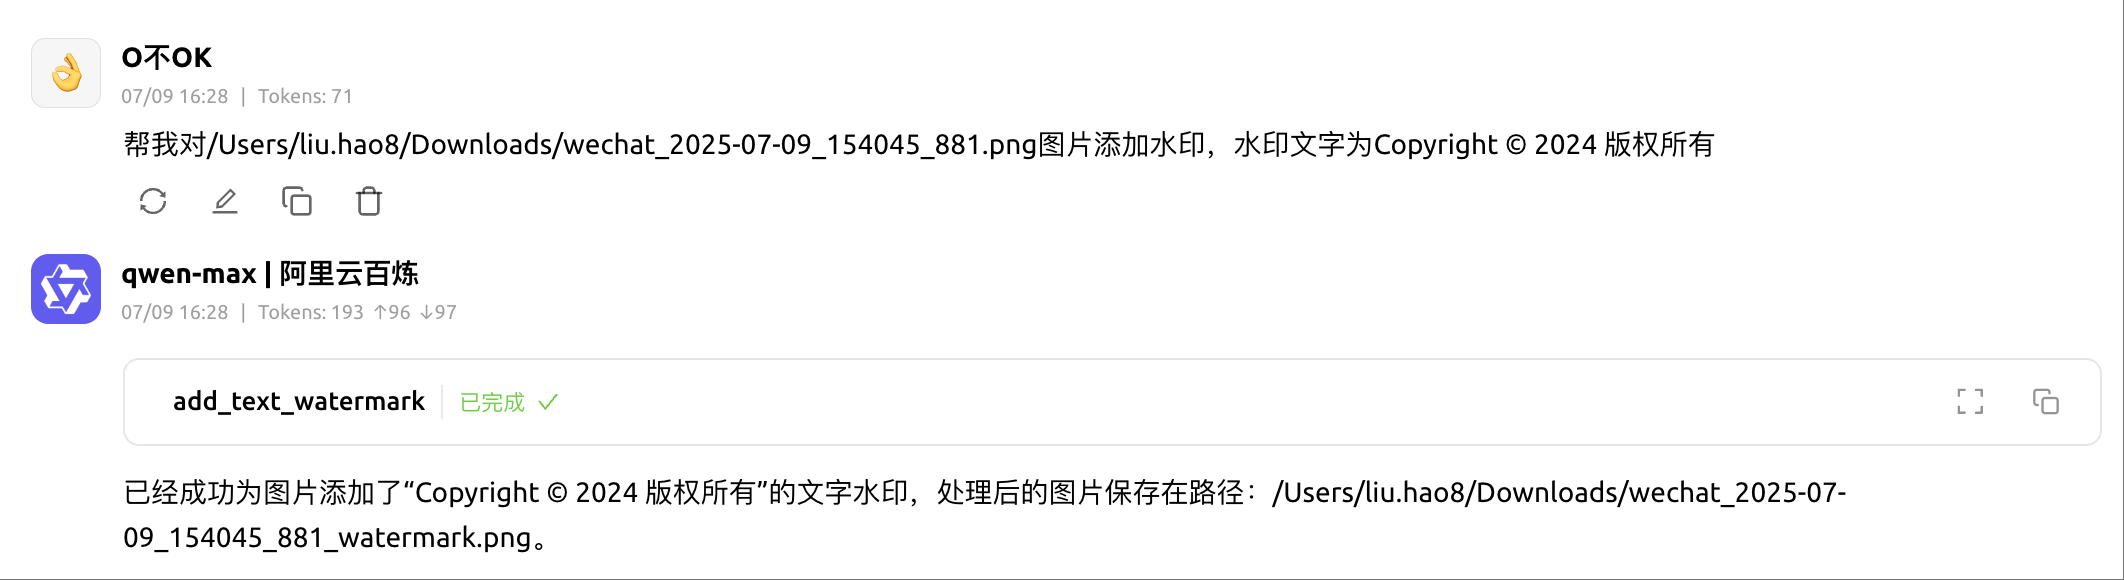
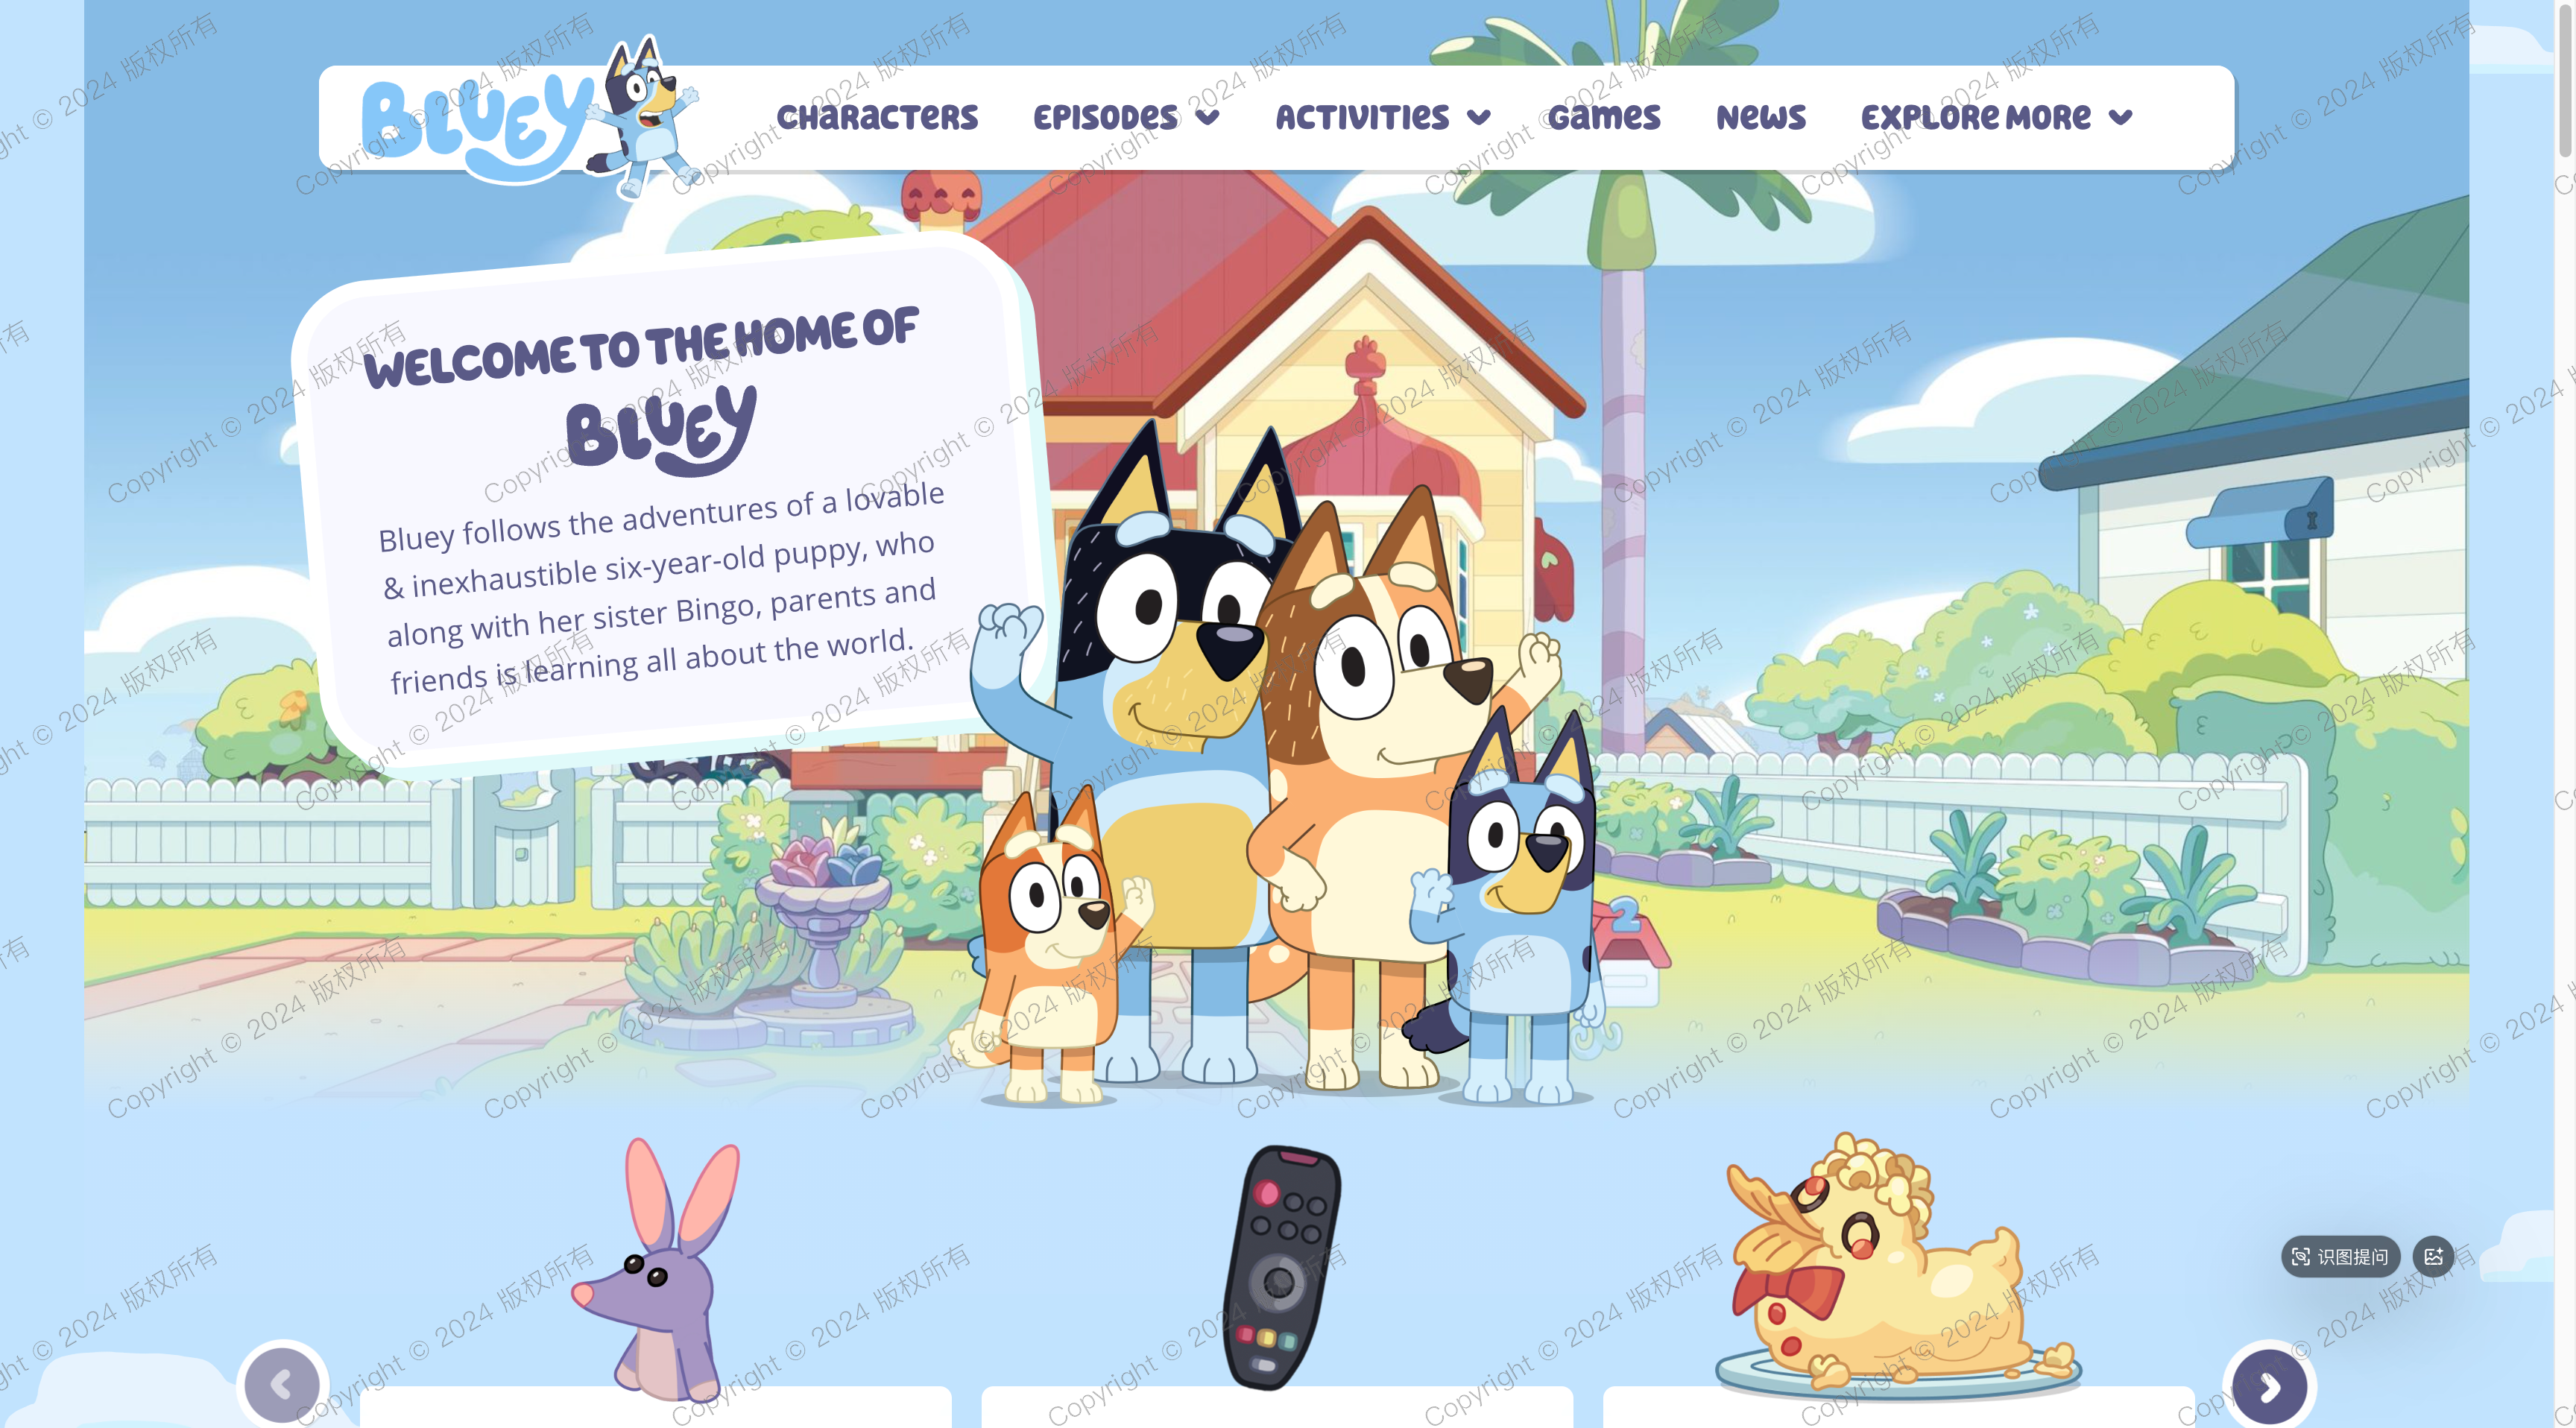
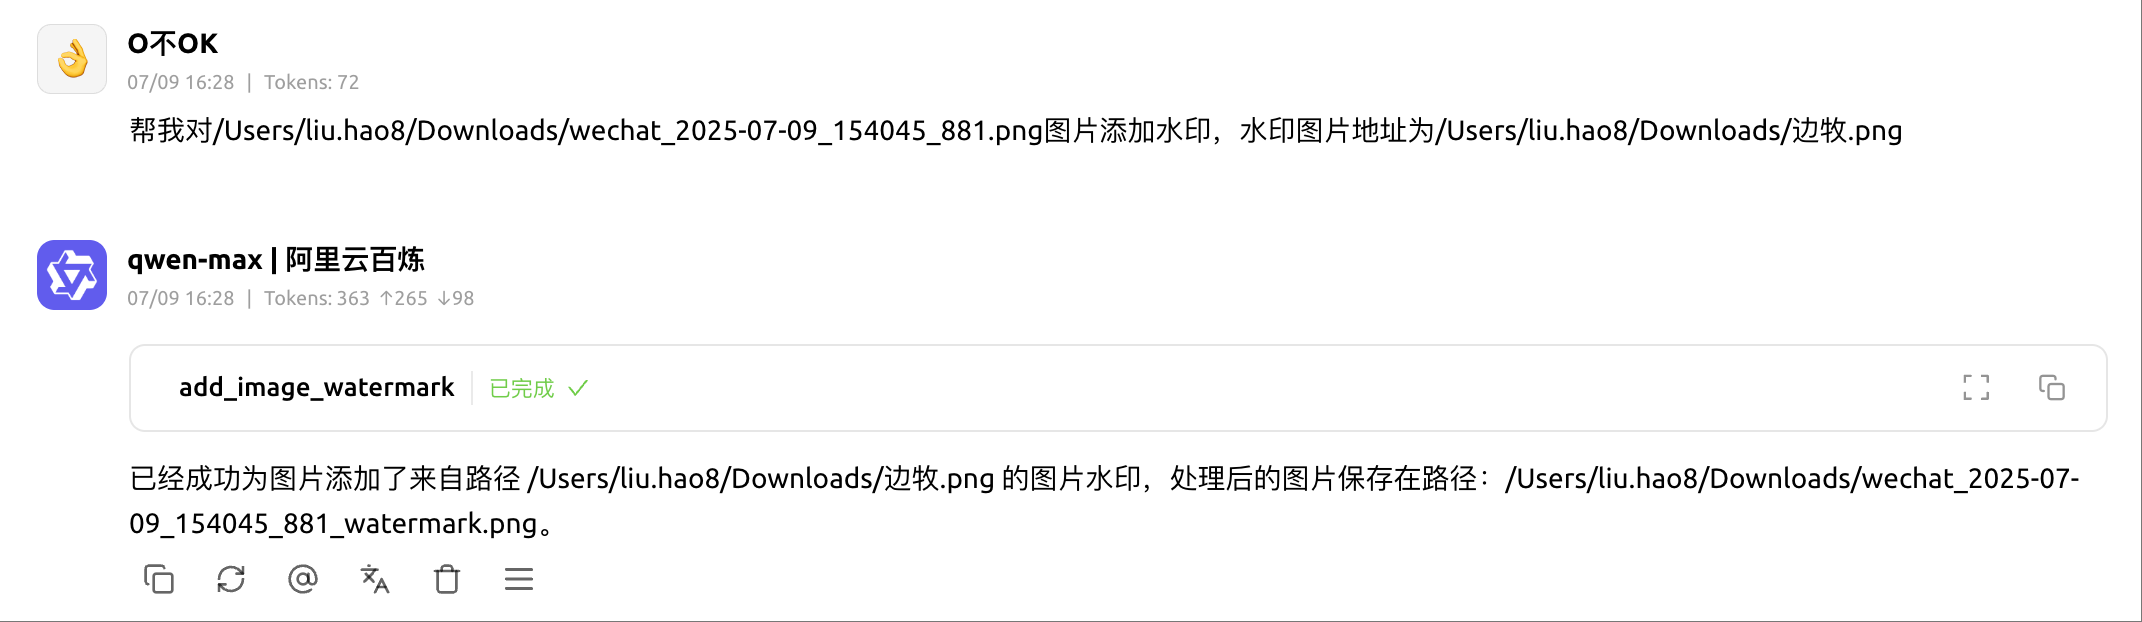
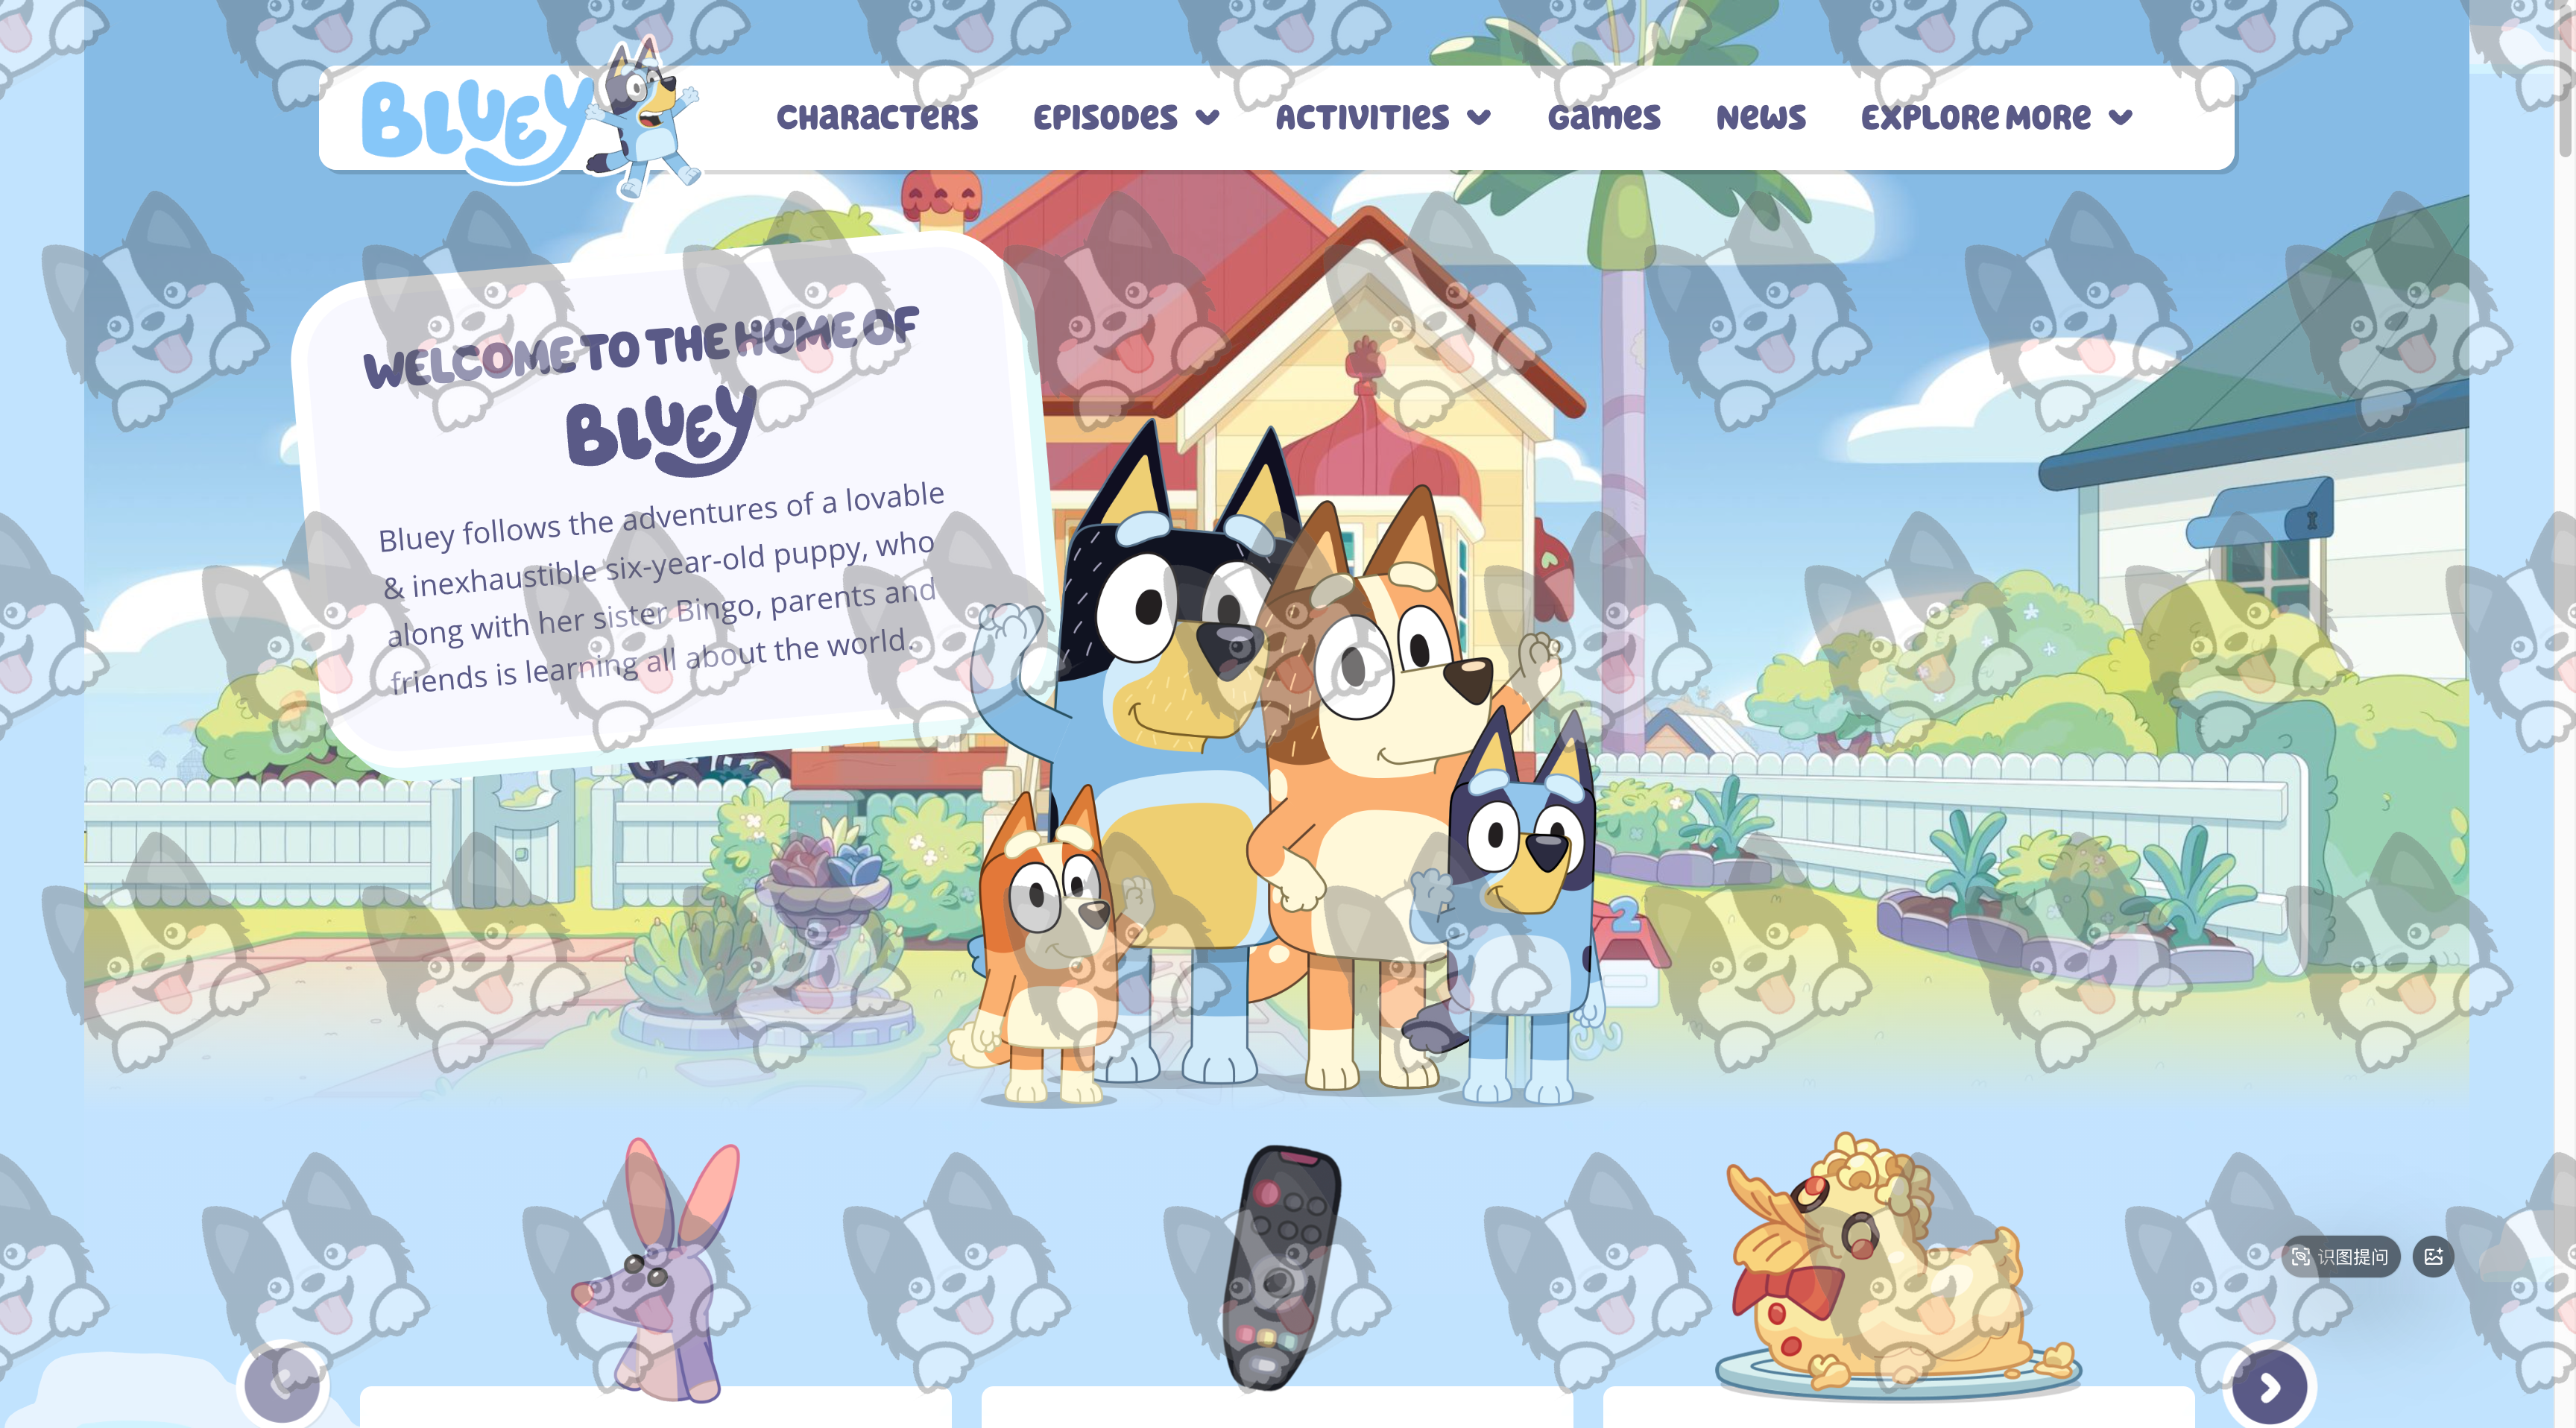
🚀 Installation
Using uv (Recommended)
```bash
Sign in to leave a review
Use Google, GitHub, or an email account so ratings stay tied to real people.
No reviews posted yet.