
Video To Claude
About
Claude to Dev - easiest way for you showcase close to video issues of your projects, this tool helps you cut out noise and focus only where you need claude to see
Details
- Author
- AdityaO5
- Downloads
- 216
- Categories
- AI
Jump to
- Annotate video frames with arrows, boxes, freehand marks, and text labels
- Captures annotated frames as WebP images directly into Claude Code
- Supports common video formats: .mp4, .mov, .webm, and others
- Bundles ffmpeg and sharp – no separate ffmpeg or Python installation needed
- Automatic quality retry (80→50) to stay under 2 MB per frame
- Slash command /vtc automates capture session and send workflow

Setting up with Highlight
This MCP is not yet compatible with Highlight’s one-click setup. However, you can still use it with Highlight by following these steps:
- Download and install Highlight from highlightai.com/download
- Navigate to the plugins tab and select "Add Custom Plugin"
-
Configure the plugin with the settings below
Plugin Name
Video To ClaudeCommand (node, npx, python, etc.)Please refer to the README for specific instructions on how to obtain API keys or other required environment variables.
- Enable "Start Automatically" if you want the plugin to start when Highlight launches





From the repository
Type /vtc in Claude Code. Option A (recommended) uses the Claude Code plugin: /plugin install github:adityaO5/video-to-claude. Option B installs via npm (claude mcp add video-to-claude --scope user -- npx video-to-claude-mcp). Option C clones and builds from GitHub. After installation, the /vtc command opens a browser; you upload a video, scrub the timeline, annotate frames with red marks, capture frames, and click Send to deliver them to the conversation.
Claude Desktop / Cursor
Paste into your MCP client config file to install this server.
{
    "mcpServers": {
        "video to claude": {
            "video-to-claude": {
                "command": "npx",
                "args": [
                    "video-to-claude-mcp"
                ]
            }
        }
    }
}McpServers
{
    "video-to-claude": {
        "command": "npx",
        "args": [
            "video-to-claude-mcp"
        ]
    }
}
video-to-claude
Drop a screen recording, scrub the timeline, draw annotations on frames, click Send — the annotated WebPs land directly in your Claude Code conversation as vision input.
<table>
<tr>
<td>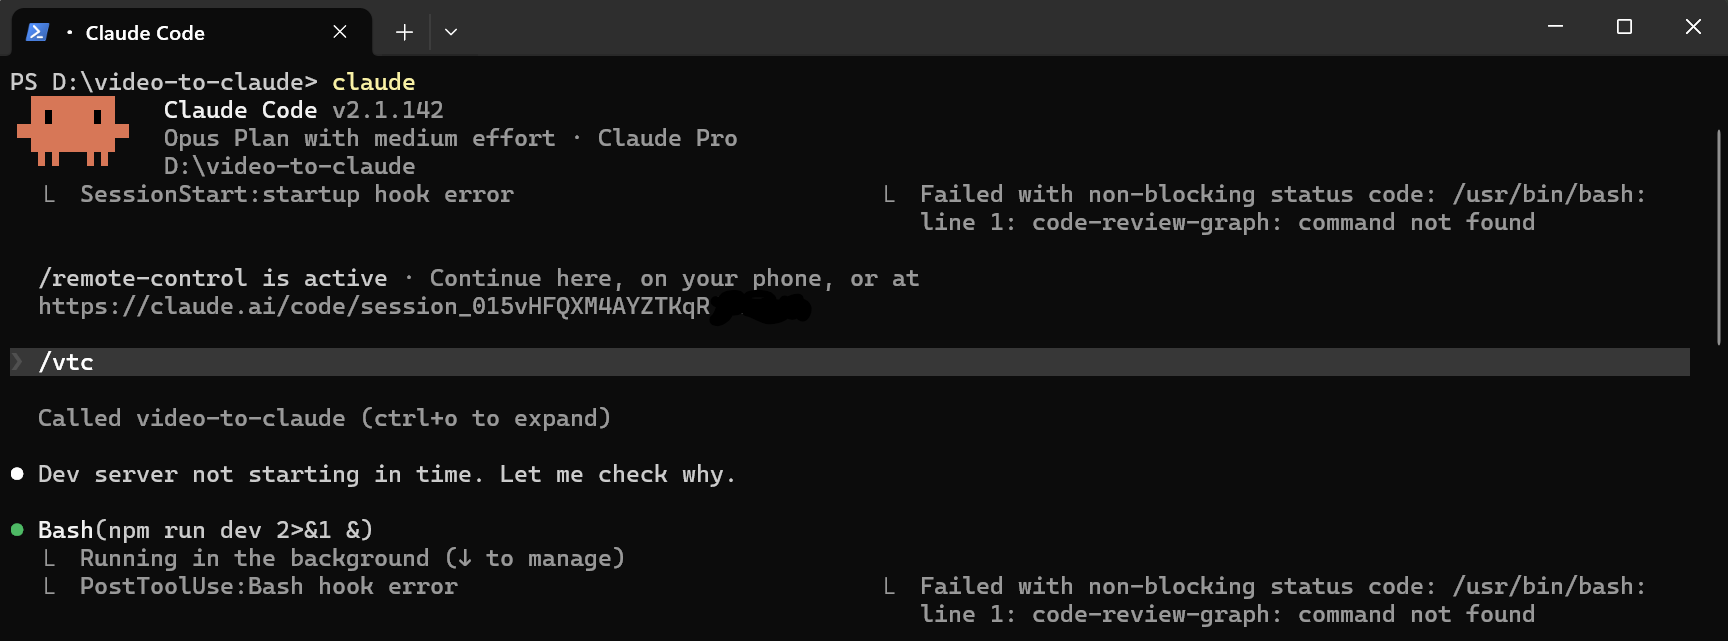 </td>
</td>
<td>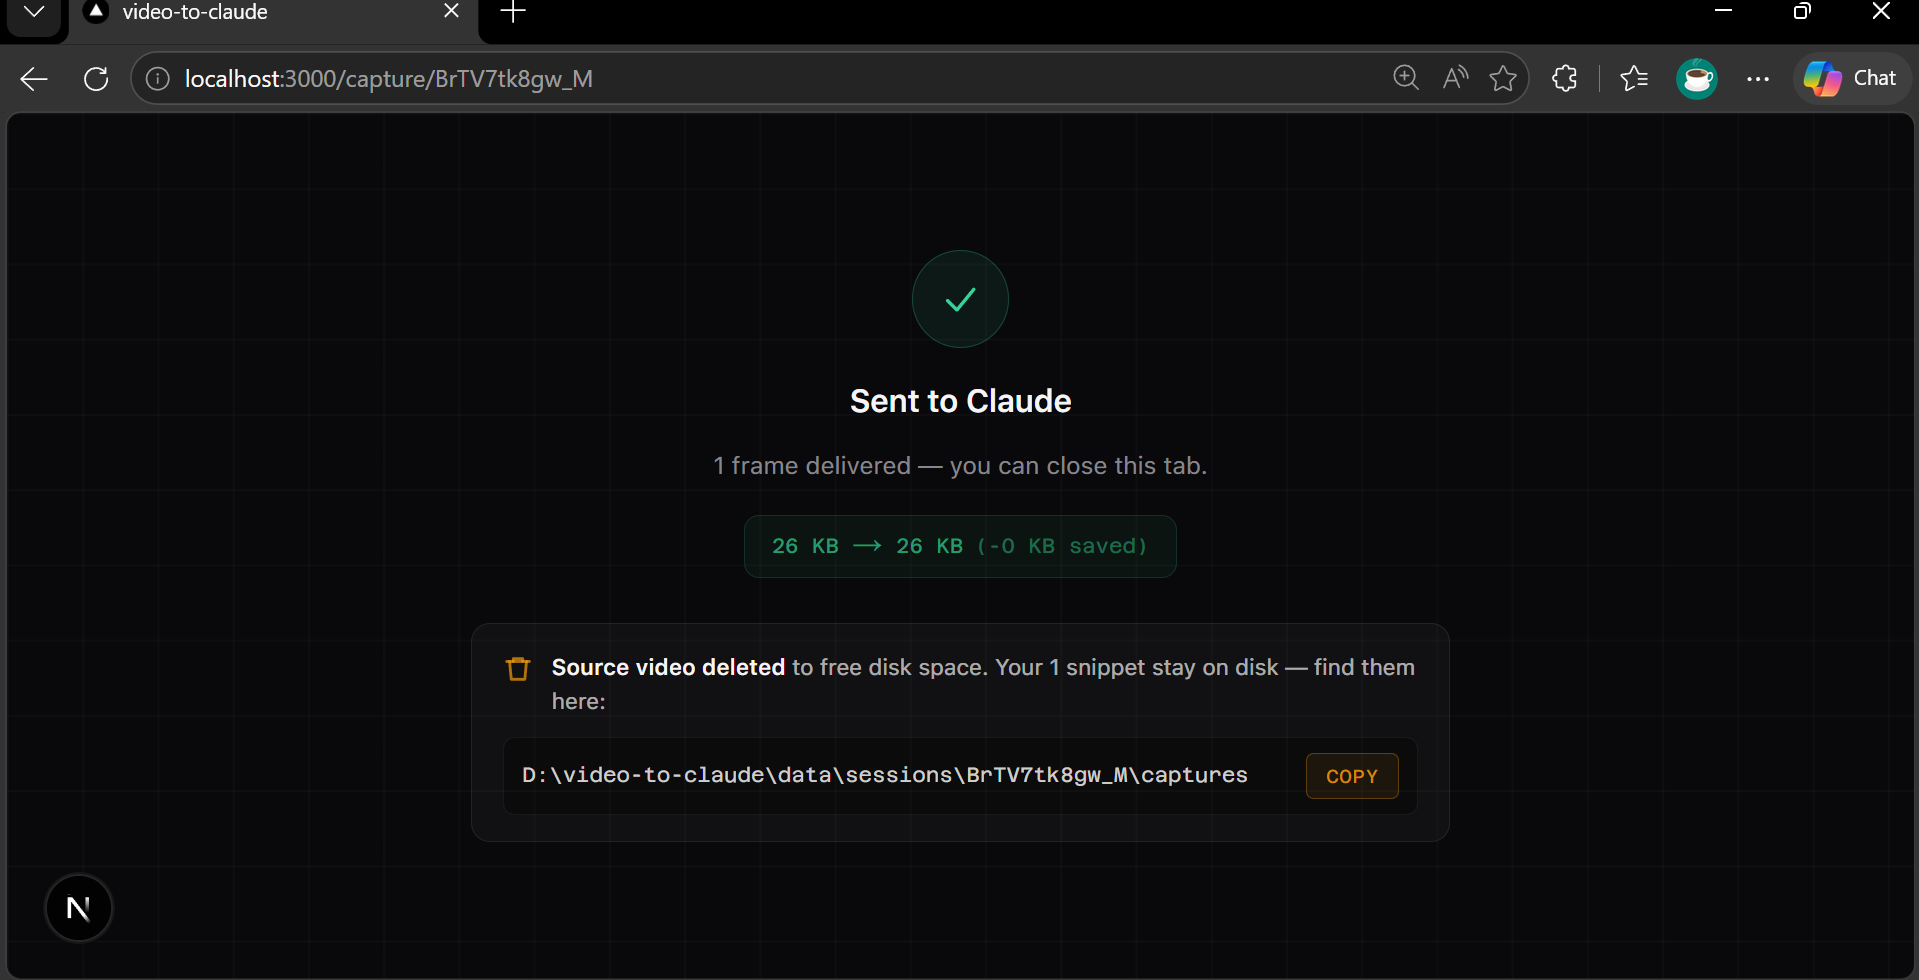 </td>
</td>
<td>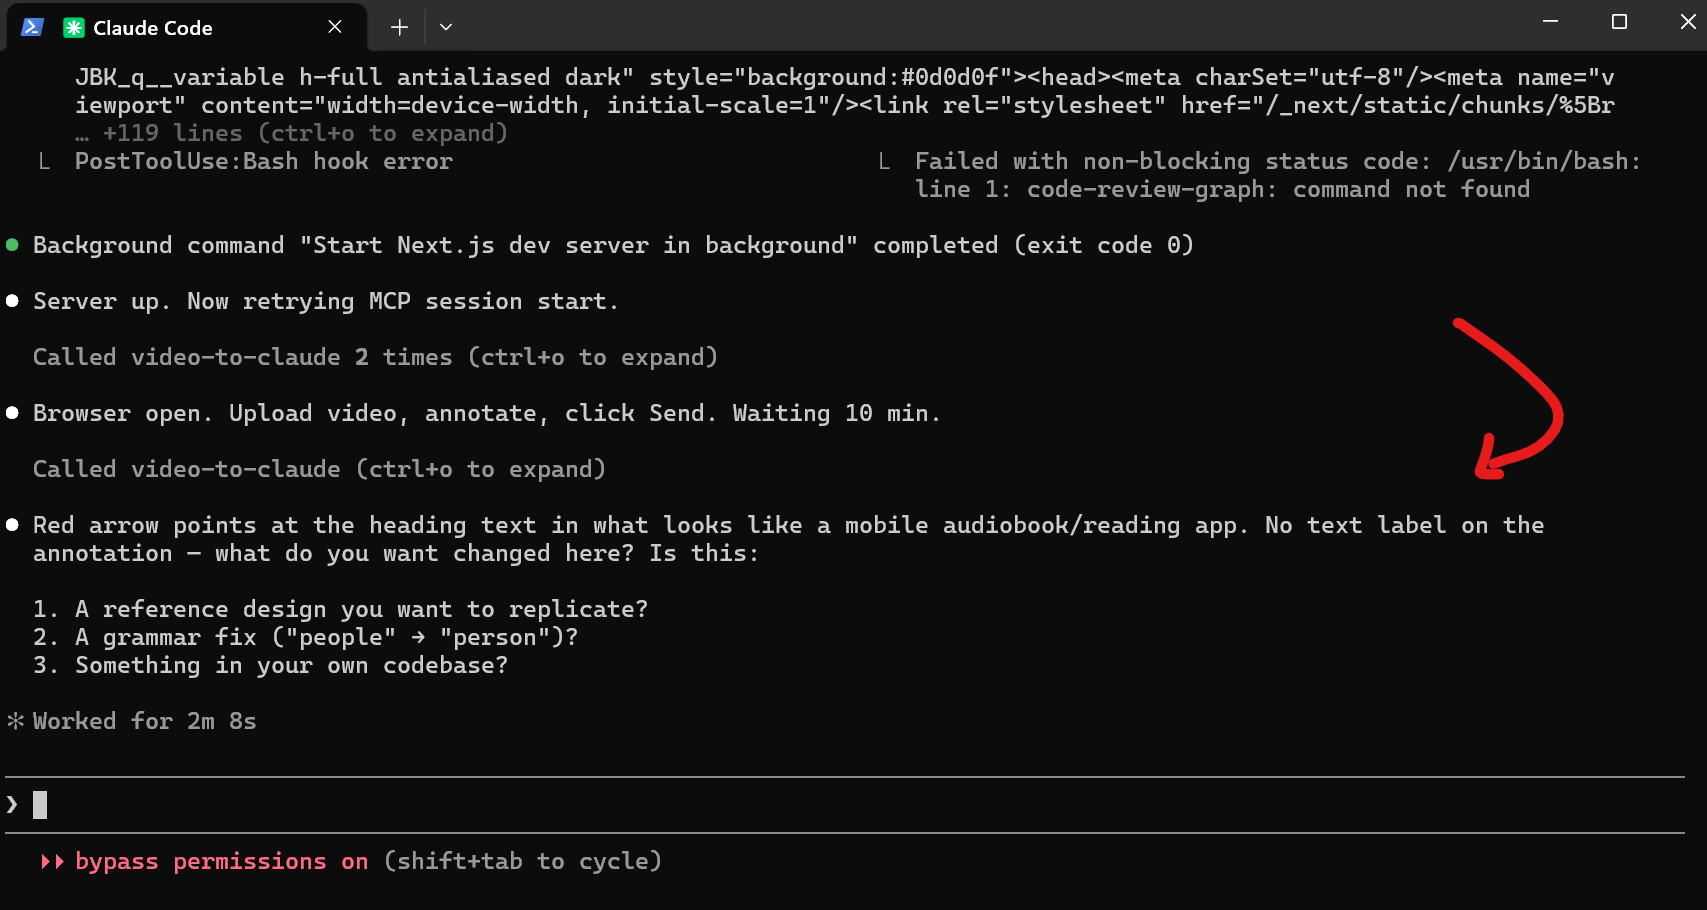 </td>
</td>
</tr>
<tr>
<td align="center"><em>Type <code>/vtc</code> in Claude Code</em></td>
<td align="center"><em>Claude receives your annotated frames</em></td>
<td align="center"><em>Claude reads the annotation and responds</em></td>
</tr>
</table>
---
How it works
1. Type /vtc in Claude Code
The MCP server starts the dev server if it isn't running, creates a session, and opens http://localhost:3000/capture/{id} in your browser.
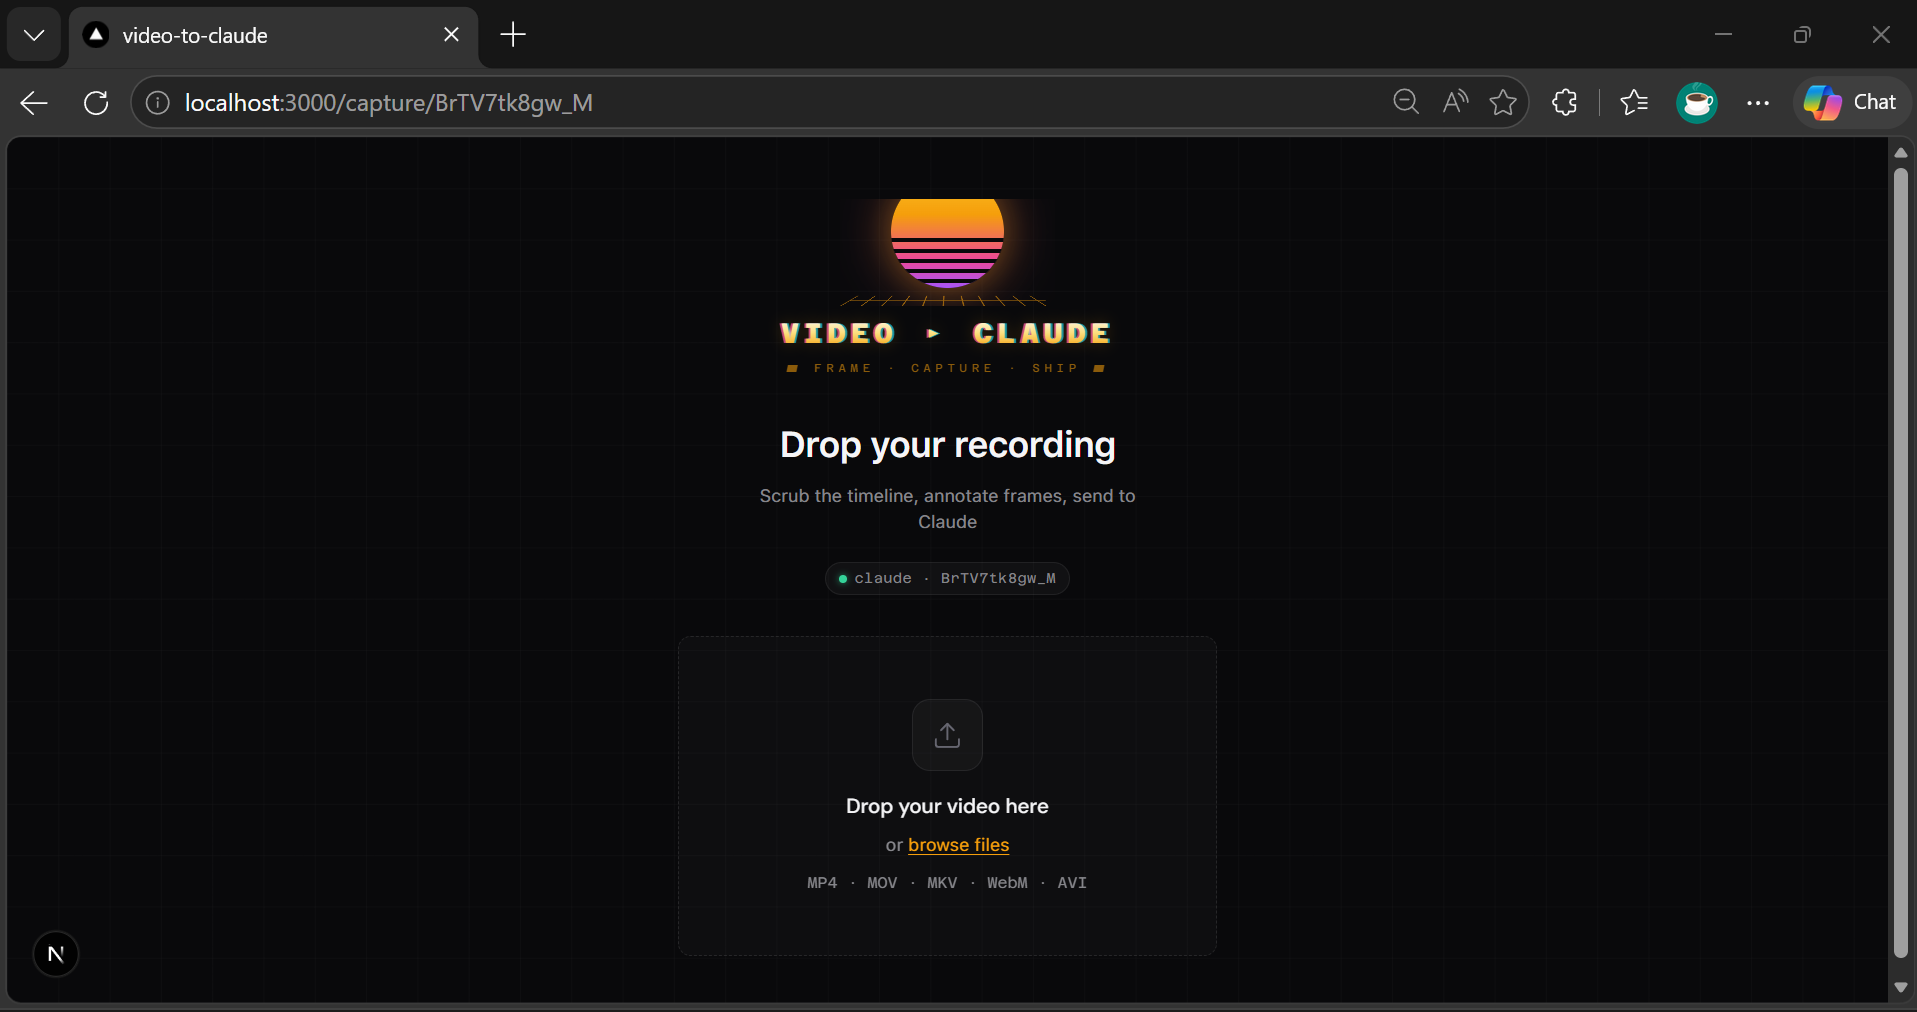
2. Drop your video
Drag a .mp4, .mov, .webm, or any common video file onto the upload zone. The file is probed with ffmpeg and the player becomes active.
3. Scrub the timeline
Use the scrubber or arrow keys to seek to the moment you want to capture. The canvas overlay sits on top of the video frame.
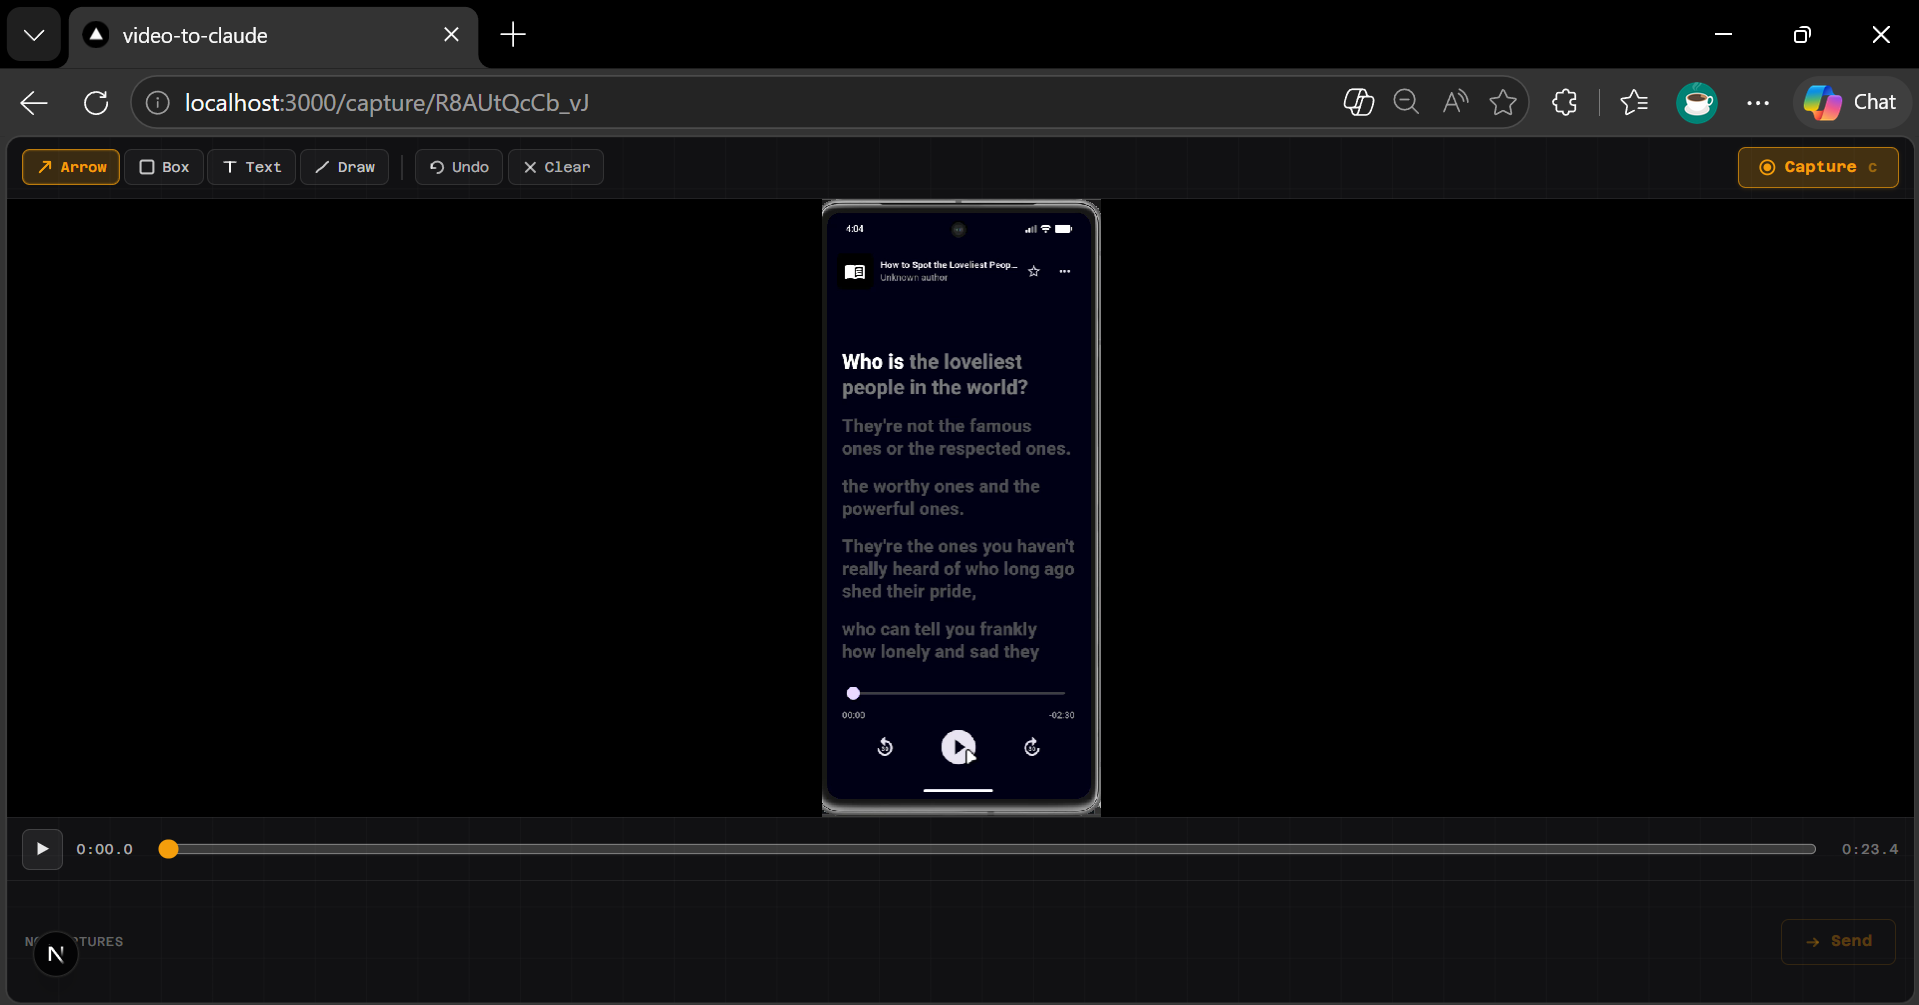
4. Annotate the frame
Draw arrows, boxes, freehand marks, and add text labels in red directly on the canvas. These annotations are baked into the exported WebP — Claude sees exactly what you circled.
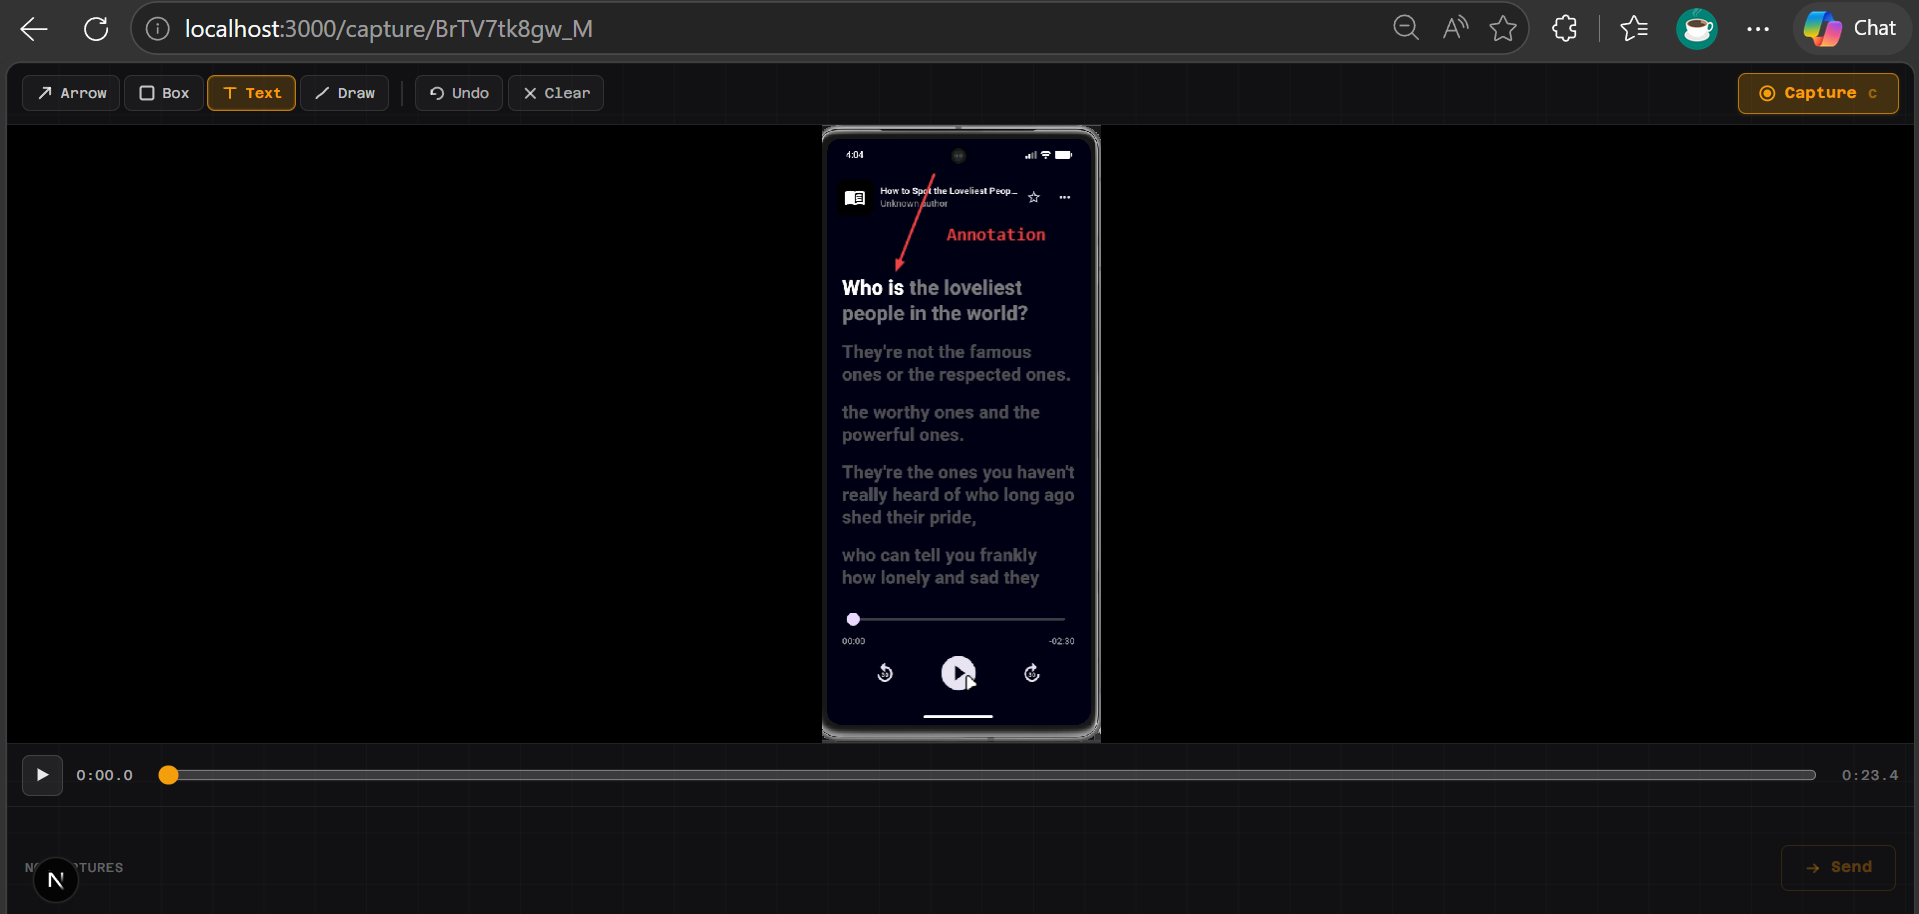
5. Capture + repeat
Click Capture to freeze the annotated frame. Repeat steps 3–4 for as many frames as you need. The capture strip at the bottom shows thumbnails.
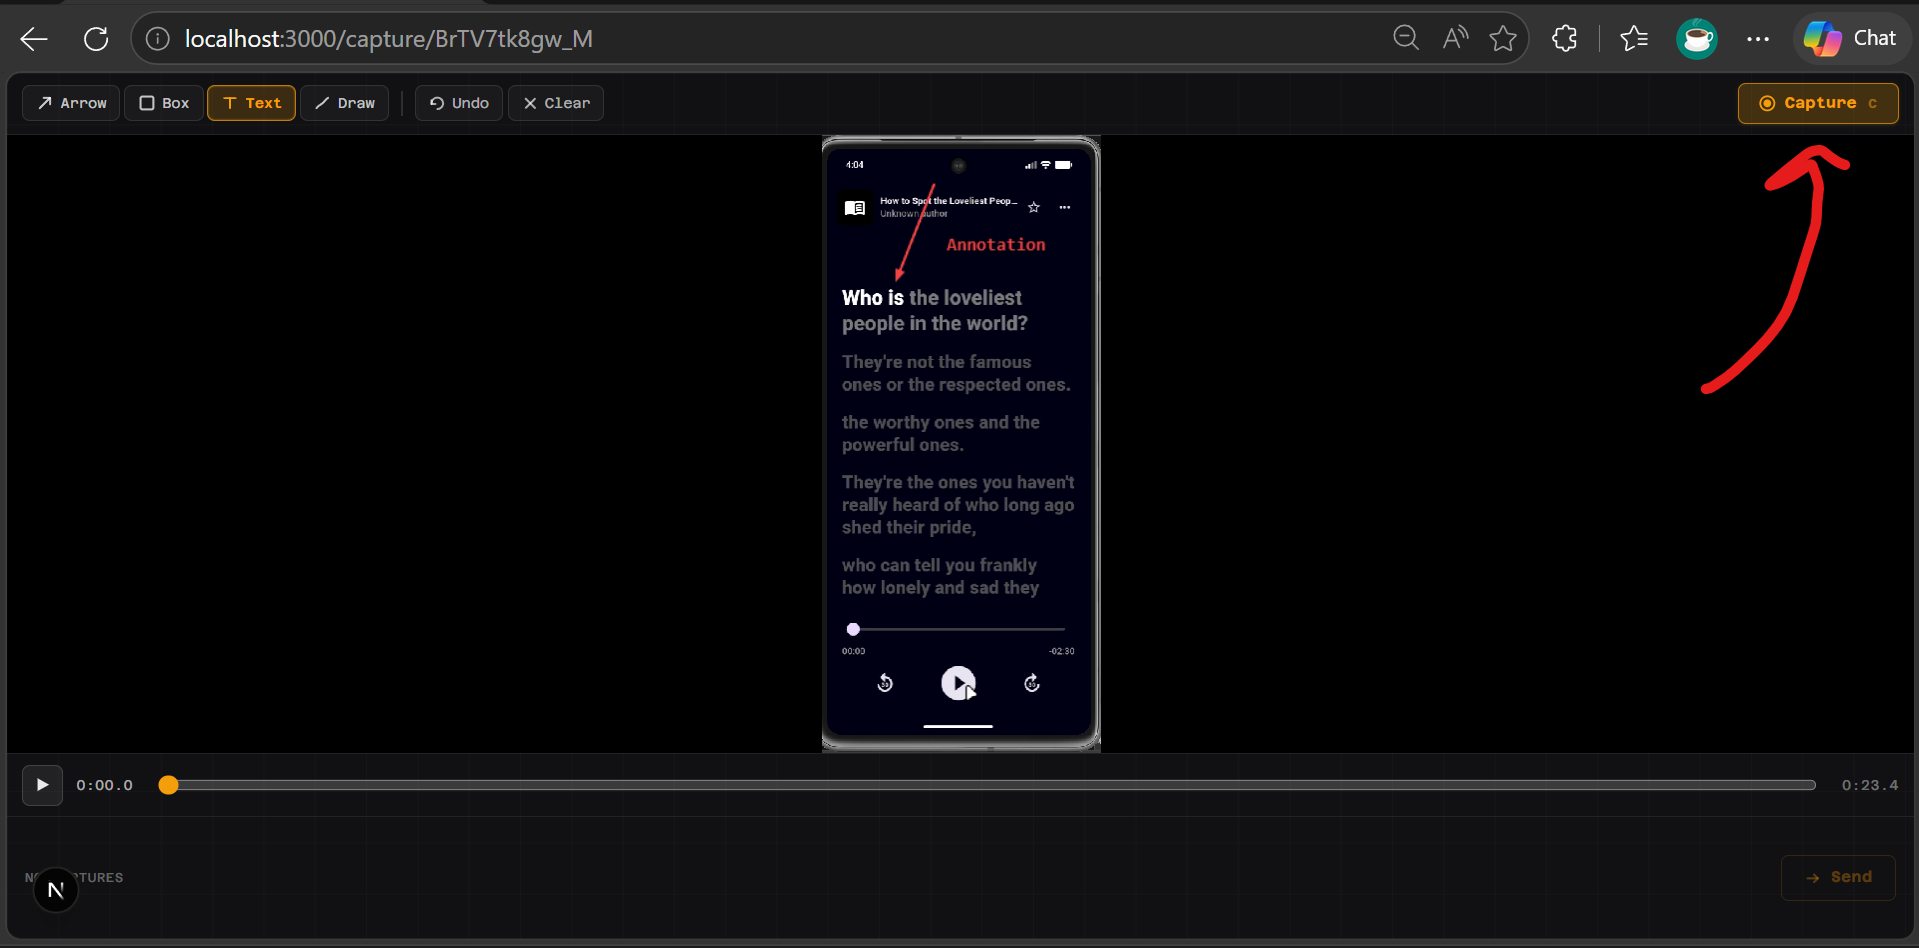
6. Send
Click Send. The MCP await_capture tool returns, delivering all annotated frames as image content blocks into the Claude Code conversation.
7. Claude describes what it sees
Claude reads the annotation — the red arrow, the circled element, or the text label — and responds directly to what you marked. No re-explaining needed.
---
Prerequisites
- Node.js 20+ (Node 24 recommended)
- Claude Code CLI installed (install guide)
- Windows, macOS, or Linux
- No Python, no ffmpeg in PATH needed — both are bundled
---
Install
Option A — Claude Code plugin (recommended)
/plugin install github:adityaO5/video-to-claude
This installs the MCP server and /video-to-claude:vtc skill in one step. No separate MCP registration or command copying needed.
Option B — npm (MCP only, no clone needed)
claude mcp add video-to-claude --scope user -- npx video-to-claude-mcp
Or manually add to ~/.claude.json:
{
  "mcpServers": {
    "video-to-claude": {
      "command": "npx",
      "args": ["video-to-claude-mcp"]
    }
  }
}
Then add the /vtc command (see below).
Option C — clone and build
git clone https://github.com/adityaO5/video-to-claude
cd video-to-claude
npm install
npm run mcp:build
Then register:
claude mcp add video-to-claude --scope user -- node /ABSOLUTE/PATH/TO/video-to-claude/dist/mcp/server.js
Replace /ABSOLUTE/PATH/TO/video-to-claude with the real path.
Windows example: C:/Users/you/repos/video-to-claude (forward slashes work in JSON).
---
Add the /vtc slash command (Options B and C only)
Plugin install (Option A) includes the skill automatically as /video-to-claude:vtc.
For Options B/C, the repo ships .claude/commands/vtc.md. Claude Code loads project-scoped slash commands only when your working directory is inside the cloned repo.
To use /vtc from any directory, copy the command file to your user-level commands folder:
```bash
Sign in to leave a review
Use Google, GitHub, or an email account so ratings stay tied to real people.
No reviews posted yet.



