UnderDoc Tutorial - Expense Analytics using GenAI and MCP server for SQLite DB
About
UnderDoc Tutorial - Expense Analytics with MCP Server for SQLite
Details
- Author
- under-doc
- GitHub stars
- 1
- Downloads
- 148
- Categories
- Database
Jump to
- Extracts structured data (shop name, amount, currency, category) from images.
- Stores extracted data in a local SQLite database.
- Uses Claude Desktop as the GenAI interface for analytics.
- Integrates the open‑source MCP server for SQLite.
- Supports multi‑language receipt/invoice images.
- Provides sample images and a pre‑populated database for testing.

Setting up with Highlight
This MCP is not yet compatible with Highlight’s one-click setup. However, you can still use it with Highlight by following these steps:
- Download and install Highlight from highlightai.com/download
- Navigate to the plugins tab and select "Add Custom Plugin"
-
Configure the plugin with the settings below
Plugin Name
UnderDoc Tutorial - Expense Analytics using GenAI and MCP server for SQLite DBCommand (node, npx, python, etc.)Please refer to the README for specific instructions on how to obtain API keys or other required environment variables.
- Enable "Start Automatically" if you want the plugin to start when Highlight launches





From the repository
First, obtain an UnderDoc API key, install uv, Python 3.12, and the SQLite CLI. Clone the tutorial repository, set up a Python virtual environment, and place expense images in the receipt-images folder. Run python main.py to extract data and save it to metabase-data/underdoc.db. Then install Claude Desktop, clone the reference MCP server for SQLite from the modelcontextprotocol/servers repository, and configure it in Claude Desktop to query the database. Finally, ask natural‑language questions about your expenses.
Claude Desktop / Cursor
Paste into your MCP client config file to install this server.
{
    "mcpServers": {
        "underdoc tutorial - expense analytics using genai and mcp server for sqlite db": {
            "underdoc-tutorial-expense-analytics-mcp-sqlite": {
                "command": "python",
                "args": [
                    "main.py"
                ]
            }
        }
    }
}McpServers
{
    "underdoc-tutorial-expense-analytics-mcp-sqlite": {
        "command": "python",
        "args": [
            "main.py"
        ]
    }
}
UnderDoc Tutorial - Expense Analytics using GenAI and MCP server for SQLite DB
- UnderDoc Tutorial - Expense Analytics using GenAI and MCP server for SQLite DB
- Introduction
- Overview
- What is MCP
- Prerequisite
- Get an UnderDoc API Key
- Step 1: Signup
- Step 2: Login
- Step 3: Get the key from "Key Management" Page
- Install uv
- Install Python 3.12
- Install sqlite command line interface
- Environment Setup
- Clone the project for this tutorial
- Setup Python Virtual Environment and Install Required Packages
- Environment Verification
- Initialize a SQLite DB (optional)
- Copy your expense images into the folder receipt-images
- Perform Data Extraction and Save to DB
- Data Verification
- Expense Analytics with Natural Language
- Install Claude Desktop
- Clone the source of reference MCP server from Github
- Install MCP Server for SQLite for Claude Desktop
- Verify the MCP server in Claude Desktop
- Overview of UnderDoc Expense (SQLite) DB
- Expense Analytics by Asking Questions
- Final words
- Resources
---
Introduction
In my previous tutorial, I discussed about how to extract structure expense data from images, store it into a SQLite DB and use Metabase to perform expense analytics.
In this tutorial, I would like to discuss using GenAI and MCP server for SQLite in performing expense analytics by chatting with a LLM in natural language.
This tutorial focus on using GenAI (Claude Desktop) and MCP server for SQLite, and assume that the database was already populated with UnderDoc expense records. You can follow the previous tutorial up to the section "Perform Data Extraction and Save to DB" (skip the rest of the sections relating to Metabase). If you want to have a quick look on how the MCP server works, you can also download the sample SQLite DB with 20 sample expense records here.
You need to have the following in order to be able to run through this tutorial:
- A laptop or desktop running MacOS
- uv (a Python runtime and package manager for running the SQLite MCP server)
- git (for cloning the MCP server source code from github)
- Claude Desktop (this is the GenAI app we are using in this tutorial, which supports MCP servers)
- Sqlite DB
For those reader haven't went through the previous tutorial, I have replicated the steps here for easy reference. If you already have the SQLite DB ready, you can skip to the section "Expense Analytics with Natural Language".
Overview
This tutorial use the following components for various tasks:
- UnderDoc for extracting data from receipt/invoice/demand-notes images
- uv for managing Python runtime and runs the MCP servers
- SQLite for storing extracted data
- Claude Desktop for Mac for expense analytics using LLM with MCP servers
What is MCP
There are too many articles discussing MCP (Model Context Protocol), so I will not go into details here. In short, MCP provided a standardized way for LLM to interact with various resources and tools required for answering users' questions.
There are already a numbers of tools supports MCP server, like Claude desktop, Cursor IDE, etc. Many other GenAI providers (e.g. OpenAI, Google, etc.) also announced the support of MCP in their services as well.
The open source MCP repo in Github had provided a list of reference servers. There is one for SQLite DB integration, which will be used in this tutorial.
Prerequisite
Get an UnderDoc API Key
The key step in this tutorial is to extract the expense information from images into structured data (e.g. shop name, amount, currency, inferred category, etc.) that is suitable for storing into a database for exploration. We will use UnderDoc, which is a cost-effective platform (with a free tier) in performing this task. This tool also works well with multi-language images.
Using UnderDoc is simple, just signup at their developer portal and get an API key.
Step 1: Signup
First of all, visit the signup page at UnderDoc Developer Portal
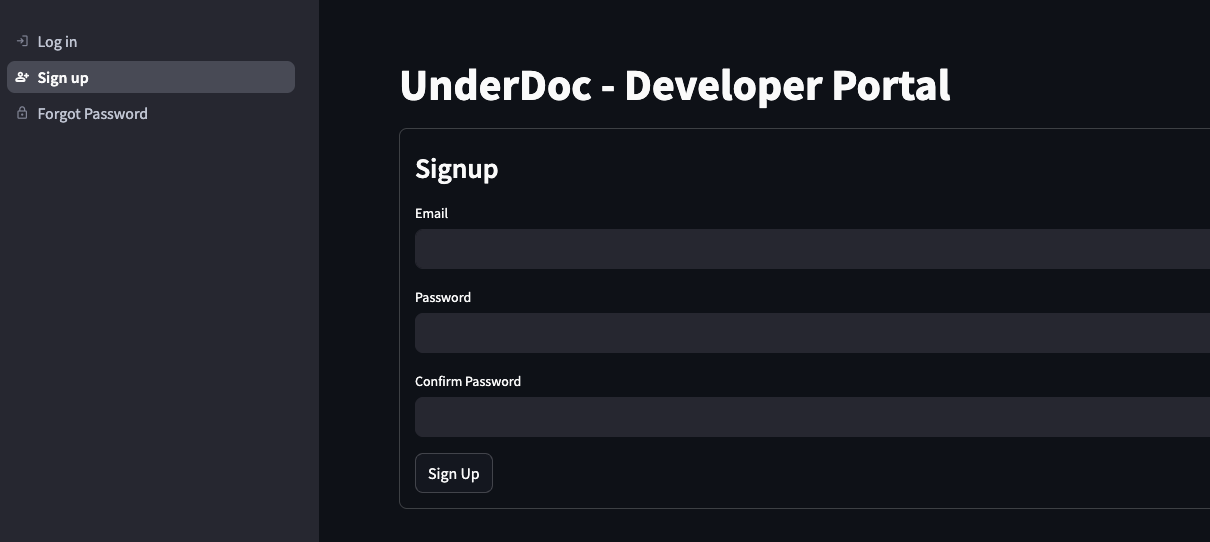
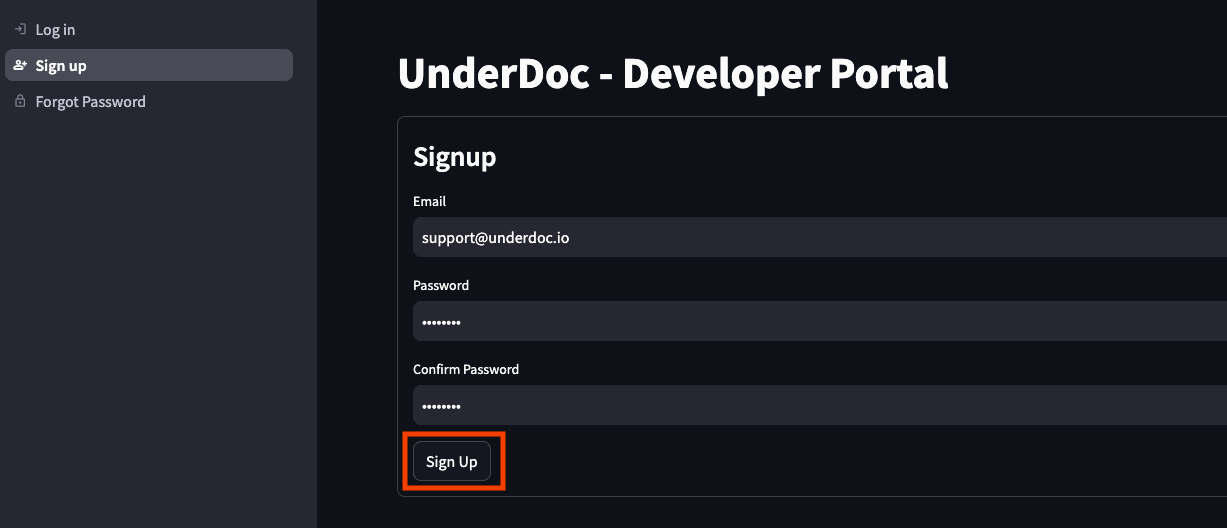
Enter your email, password and then confirm Sign Up.
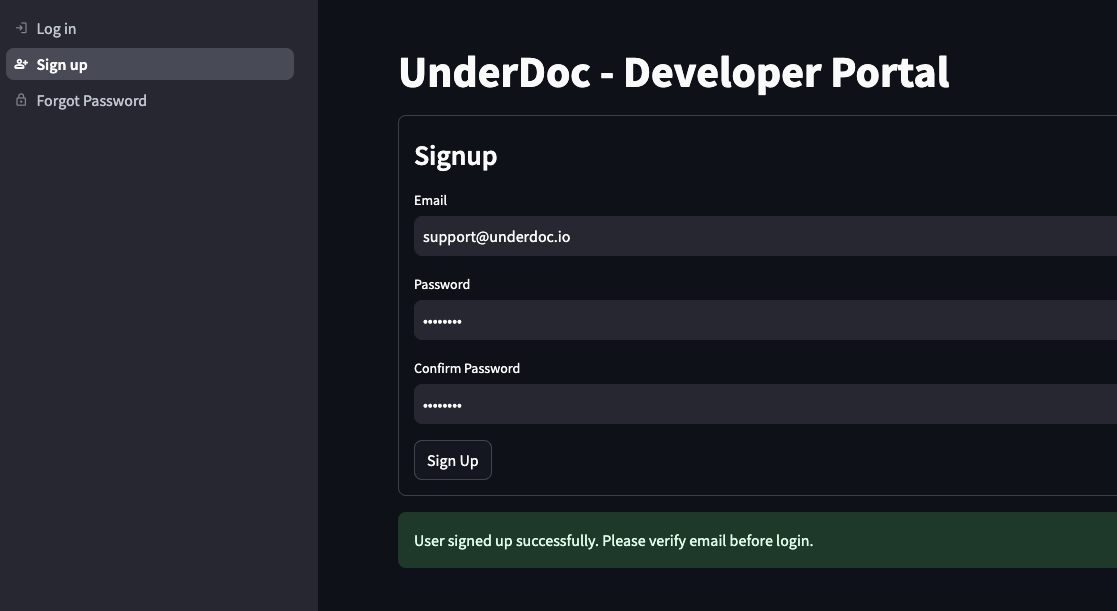
Upon sign up successful, you will receive an email. You need to verify your email before login.
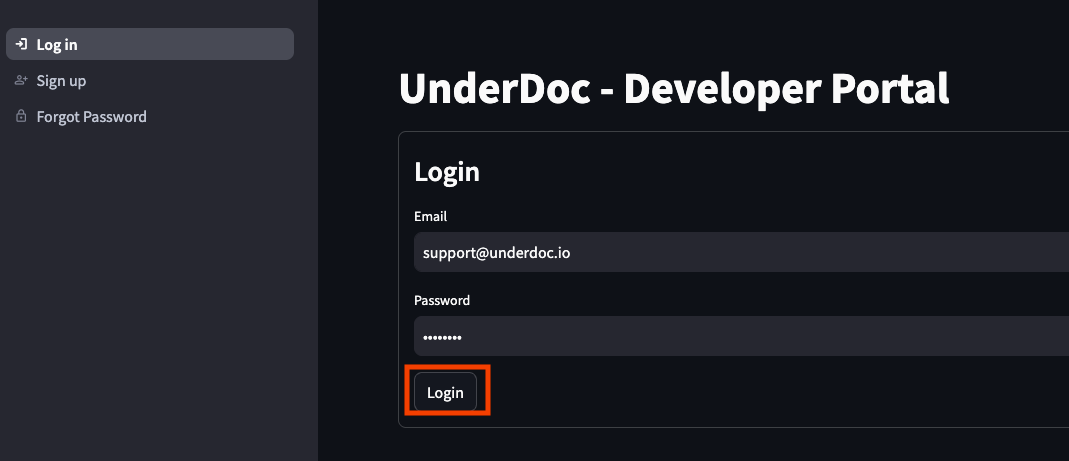
Step 2: Login
Once sign up success and email verified, you can then login to UnderDoc Developer Portal to login.
Step 3: Get the key from "Key Management" Page
On the left, select "Key Management".
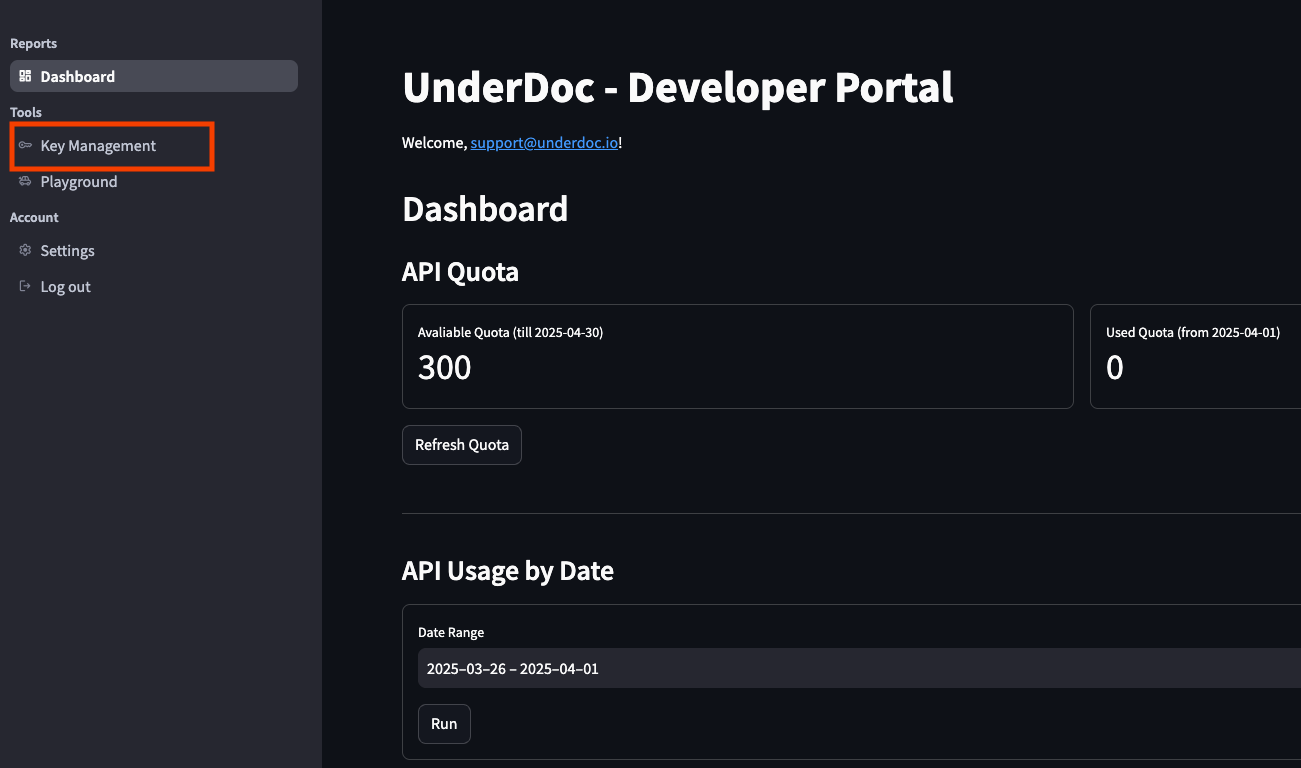
In the Key Management page, click the eye icon to display the key, and then copy it for use later in this tutorial.
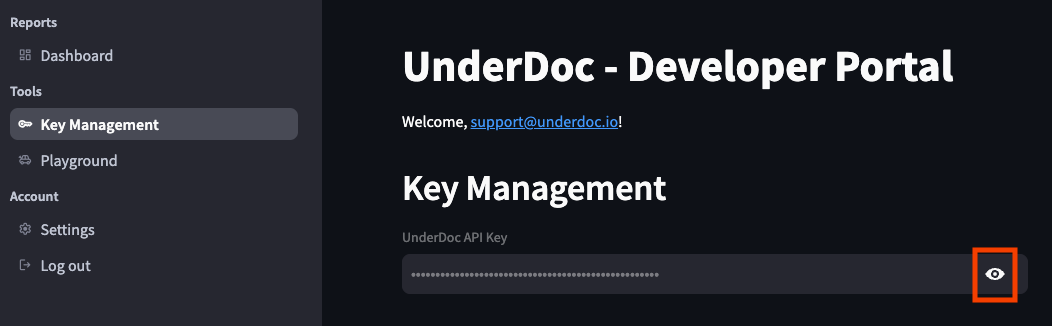
Now you have the UnderDoc API key, and can proceed to the rest of the tutorial.
Install uv
To run the SQLite MCP server, "uv" is required. You can refer to their site for installation instructions. The easiest way is to install it using brew:
brew install uv
Install Python 3.12
This tutorial was tested with Python 3.12. To install this into your Mac, the easiest way is to install via homebrew. The following is the command.
brew install python@3.12
Install sqlite command line interface
The expense data extracted will be persisted to SQLite DB locally. We will use SQLite to verify the database as well as the data stored. To install, we also use homebrew.
brew install sqlite
This concludes all prerequisites, let's proceed to environment setup!
Environment Setup
Clone the project for this tutorial
All the Python scripts required, and some sample images were provided by this tutorial. Clone it from GitHub with the following command.
git clone https://github.com/under-doc/underdoc-expense-analytics-tutorial.git
Once cloned, change directory into the project folder. For example, my folder is as follows:
/Users/clarenceho/workspace/underdoc/underdoc-expense-analytics-tutorial
In this folder, you will see some folders and files. The following is an overview:
- README.md: this file
- model.py: the Python script for model classes
- main.py: the Python script for the extraction process
- requirements.txt: the Python library packages that this project requires
- receipt-images: the expense images should be put here. You can see 20 sample images provided
- metabase-data: this is where the Metabase and UnderDoc database will be stored
Setup Python Virtual Environment and Install Required Packages
The next step is to create a Python virtual environment for this tutorial and install the required packages. Run the following commands in order.
```bash
Sign in to leave a review
Use Google, GitHub, or an email account so ratings stay tied to real people.
No reviews posted yet.