
Developing a Spring AI Enhanced Restaurant Booking System Employing an API-first Approach
About
This multi-module project hosts a client code-generated from an OpenAPI derivative of the ResOs API combined with a Spring AI implementation. It also includes an MCP server, MCP client configuration for use with Claude and a standalone ReactJS powered chatbot UI.
Details
- Author
- pacphi
- Downloads
- 353
- Categories
- Developer Tools, API
Jump to
- MCP server for restaurant search and booking tools
- Integrates with ResOS API or local backend
- Works with Claude Desktop as MCP client
- Includes a standalone ReactJS chatbot UI
- Supports multiple LLM providers (OpenAI, Groq Cloud, OpenRouter)
- Built with Spring Boot, Spring AI, and Spring Data JDBC
Configure the server by setting the RESOS_API_ENDPOINT environment variable (defaults to https://api.resos.com/v1). Launch the backend if needed, then run the MCP server jar with Java. For Claude Desktop, add a tool entry in claude_desktop_config.json pointing to the jar. Alternatively, run the chatbot module with an LLM provider API key.
Developing a Spring AI Enhanced Restaurant Booking System Employing an API-first Approach



This multi-module project hosts a client code-generated from an OpenAPI derivative of the ResOs API combined with a Spring AI implementation.
It also includes an MCP server, MCP client configuration for use with Claude and a standalone ReactJS powered chatbot UI.
Background
Getting started
Prerequisites
How to
Clone
Build
Consume
Run
Also see
ResoOS API
the spark that lit this project up
Roadmap
Background
As a Spring Boot and Spring AI developer, I want
to consume libraries that make it convenient to add capabilities to my application(s)
as for the following
Use-case:
Imagine instead of using OpenTable or Tock you could converse with a chatbot to search for restaurant(s) and make reservation(s) on your behalf.
Getting started
Start with:
A Github account
(Optional) An API key from ResOS
you only need one if you intend to register as a restaurateur!
we will spin up a backend that is API-compatible, implemented with Spring Boot Starter Data JDBC
An LLM provider
e.g., Groq Cloud, OpenRouter, or OpenAI
Prerequisites
Git CLI (2.43.0 or better)
Github CLI (2.65.0 or better)
httpie CLI (3.2.2 or better)
Java SDK (21 or better)
Maven (3.9.9 or better)
an LLM provider account (if using public cloud or commercially hosted models)
How to clone
with Git CLI
git clone https://github.com/pacphi/spring-ai-resos
with Github CLI
gh repo clone pacphi/spring-ai-resos
How to build
Open a terminal shell, then execute:
cd spring-ai-resos
mvn clean install
How to consume
If you want to incorporate any of the starters as dependencies in your own projects, you would:
Add dependency
Maven
<dependency>
    <groupId>me.pacphi</groupId>
    <artifactId>spring-ai-resos-client</artifactId>
    <version>{release-version}</version>
</dependency>
Gradle
implementation 'me.pacphi:spring-ai-resos-client:{release-version}'
> Replace occurrences of {release-version} above with a valid artifact release version number
Add configuration
Following Spring Boot conventions, you would add a stanza like this to your:
application.properties
default.url=${RESOS_API_ENDPOINT:https://api.resos.com/v1}
application.yml
default:
  url: ${RESOS_API_ENDPOINT:https://api.resos.com/v1}
> To activate the client, specify an API key (if required), and tune other associated configuration.
Consult the chatbot module's configuration for alternative dependencies and configuration that are available to add.
Configuration will be found in labeled spring.config.activate.on-profile sections of the application.yml file.
How to run
You're going to need to launch the backend module first, unless you're a restaurateur, and you have a valid API key for interacting with the ResOS v1.2 API.
To launch the backend, open a terminal shell and execute
cd backend
mvn clean spring-boot:run -Dspring-boot.run.profiles=dev -Dspring-boot.run.jvmArguments="--add-opens java.base/java.net=ALL-UNNAMED"
There's the chatbot module.
But there's also a way to integrate with Claude desktop via MCP client configuration that will consume the MCP server implementation.
with Claude Desktop
Follow these instructions.
Add the following stanza to a file called claude_desktop_config.json:
"spring-ai-resos": {
  "command": "java",
  "args": [
    "-jar",
    "<path-to-project>/target/spring-ai-resos-mcp-server-0.0.1-SNAPSHOT.jar"
  ]
}
or for testing with backend
"spring-ai-resos": {
  "command": "java",
  "args": [
    "-Dspring.profiles.active=dev",
    "-jar",
    "<path-to-project>/target/spring-ai-resos-mcp-server-0.0.1-SNAPSHOT.jar"
  ]
}
Restart Claude Desktop instance.
Verify that you have a new set of tool calls available.
Chat with Claude.
with Chatbot
Follow these instructions.
To launch the server module, open a terminal shell and execute
cd mcp-server
export RESOS_API_ENDPOINT=http://localhost:8080/api/v1/resos
mvn spring-boot:run -Dspring-boot.run.profiles=cloud,dev
Next, we'll store an API key in a credential file that will allow the chatbot to interact with an LLM service provider.
cd ../mcp-client
leveraging OpenAI
Build and run a version of the chatbot that is compatible for use with OpenAI. You will need to obtain an API key.
Before launching the app:
Create a config folder which would be a sibling of the src folder. Create a file named creds.yml inside that folder. Add your own API key into that file.
spring:
  ai:
    openai:
      api-key: {REDACTED}
{REDACTED} above with your OpenAI API key
Next, to launch the chatbot, open a terminal shell and execute
mvn spring-boot:run -Dspring-boot.run.profiles=openai,dev
leveraging Groq Cloud
Build and run a version of the chatbot that is compatible for use with Groq Cloud. You will need to obtain an API key.
Note that Groq does not currently have support for text embedding. So if you intend to run with the groq-cloud Spring profile activated, you will also need to provide additional credentials
Before launching the app:
Create a config folder which would be a sibling of the src folder. Create a file named creds.yml inside that folder. Add your own API key into that file.
spring:
  ai:
    openai:
      api-key: {REDACTED-1}
      embedding:
        api-key: {REDACTED-2}
{REDACTED-1} and {REDACTED-2} above with your Groq Cloud API and OpenAI keys respectively.
Next, to launch the chatbot, open a terminal shell and execute
mvn spring-boot:run -Dspring-boot.run.profiles=groq-cloud,dev
leveraging OpenRouter
Build and run a version of the chatbot that is compatible for use with OpenRouter. You will need to obtain an API key.
Note that OpenRouter does not currently have support for text embedding. So if you intend to run with the openrouter Spring profile activated, you will also need to provide additional credentials
Before launching the app:
Create a config folder which would be a sibling of the src folder. Create a file named creds.yml inside that folder. Add your own API key into that file.
spring:
  ai:
    openai:
      api-key: {REDACTED-1}
      embedding:
        api-key: {REDACTED-2}
{REDACTED-1} and {REDACTED-2} above with your OpenRouter API and OpenAI keys respectively.
Next, to launch the chatbot, open a terminal shell and execute
mvn spring-boot:run -Dspring-boot.run.profiles=openrouter,dev
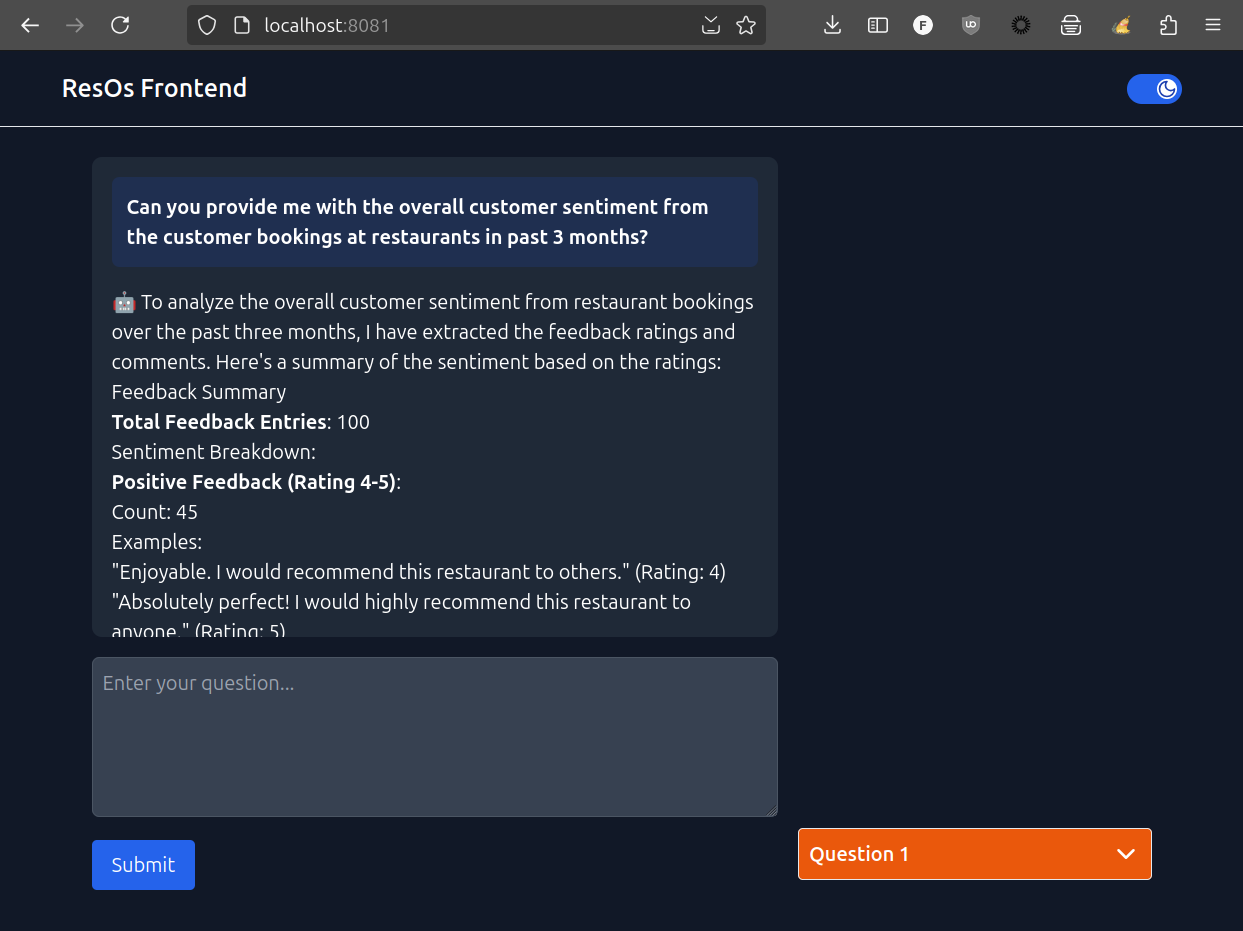
Now, visit http://localhost:8081 in your favorite web-browser.
Sign in to leave a review
Use Google, GitHub, or an email account so ratings stay tied to real people.
No reviews posted yet.





