MCP TTS VOICEVOX
About
A Text-to-Speech server that integrates with an external VOICEVOX engine.
Details
- Author
- kajidog
- GitHub stars
- 15
- Downloads
- 211
- Categories
- Communication, Other
Jump to
- Text-to-speech for AI assistants (Claude Desktop, ChatGPT, etc.)
- Interactive UI audio player with play/pause and track controls
- Multi-speaker dialogue with segment editing and reordering
- WAV export, user dictionary manager, and cross-session state restore
- Streaming playback via ffplay (optional) or fallback temp-file playback
- Cross-platform: Windows, macOS, Linux (including WSL and Docker)

Setting up with Highlight
This MCP is not yet compatible with Highlight’s one-click setup. However, you can still use it with Highlight by following these steps:
- Download and install Highlight from highlightai.com/download
- Navigate to the plugins tab and select "Add Custom Plugin"
-
Configure the plugin with the settings below
Plugin Name
MCP TTS VOICEVOXCommand (node, npx, python, etc.)Please refer to the README for specific instructions on how to obtain API keys or other required environment variables.
- Enable "Start Automatically" if you want the plugin to start when Highlight launches





From the repository
Requires Node.js 20+ (or Bun) and a running VOICEVOX Engine (or use Docker Compose). Install via npx -y @kajidog/mcp-tts-voicevox (or bunx) in your Claude Desktop configuration, then restart Claude Desktop. Optional: install ffplay for streaming playback. Environment variables configure engine URL, speakers, playback options, and UI player settings.
Claude Desktop / Cursor
Paste into your MCP client config file to install this server.
{
    "mcpServers": {
        "mcp tts voicevox": {
            "mcp-tts-voicevox": {
                "command": "docker",
                "args": [
                    "compose",
                    "up",
                    "-d"
                ]
            }
        }
    }
}McpServers
{
    "mcp-tts-voicevox": {
        "command": "docker",
        "args": [
            "compose",
            "up",
            "-d"
        ]
    }
}
VOICEVOX TTS MCP
English | 日本語
A text-to-speech MCP server using VOICEVOX
> 🎮 Try the Browser Demo — Test VoicevoxClient directly in your browser
What You Can Do
- Make your AI assistant speak — Text-to-speech from MCP clients like Claude Desktop
- UI Audio Player (MCP Apps) — Play audio directly in the chat with an interactive player (ChatGPT / Claude Desktop / Claude Web etc.)
- Multi-character conversations — Switch speakers per segment in a single call
- Smooth playback — Queue management, immediate playback, prefetching, streaming
- Cross-platform — Works on Windows, macOS, Linux (including WSL)
UI Audio Player (MCP Apps)
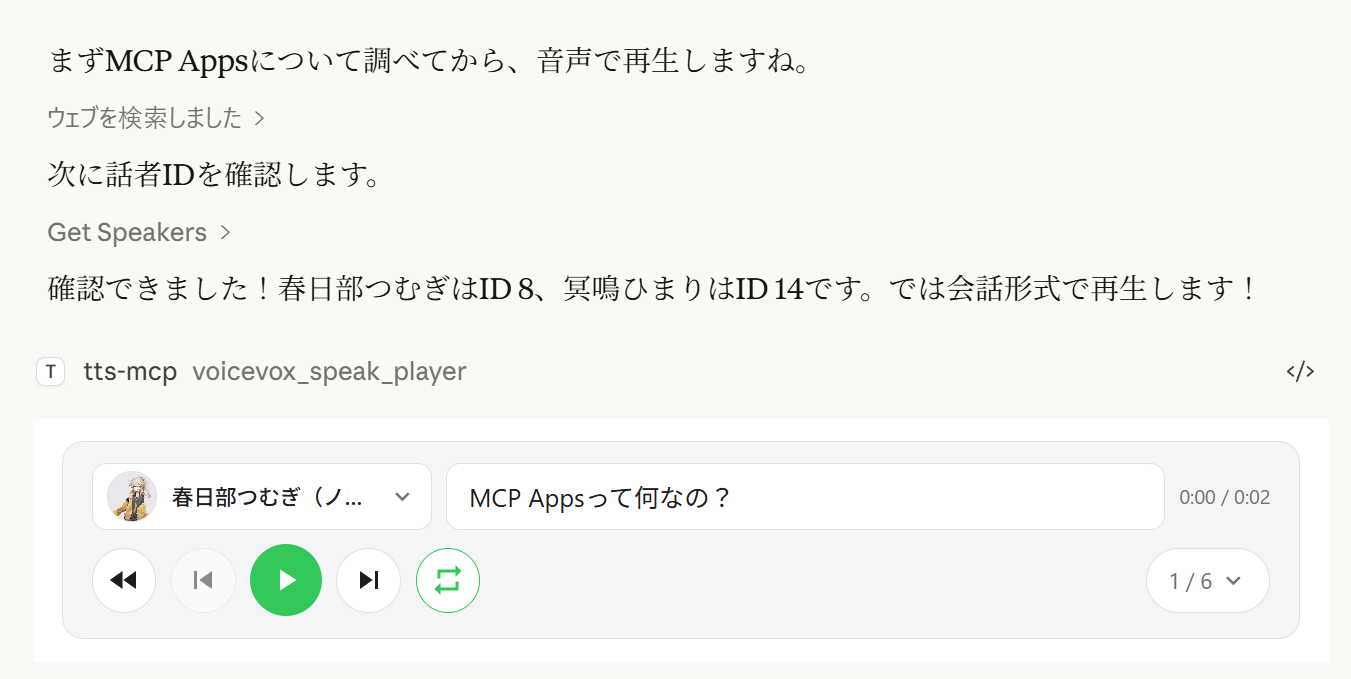
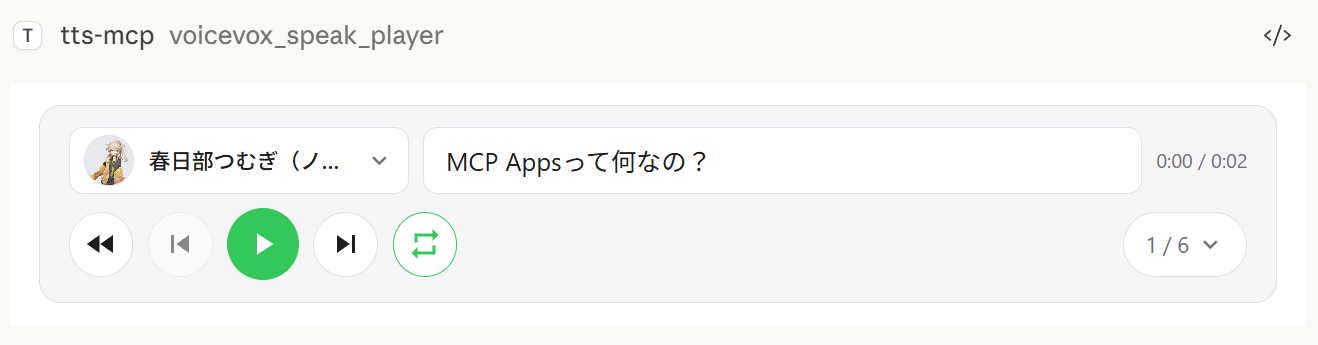
The voicevox_speak_player tool uses MCP Apps to render an interactive audio player directly inside the chat. Unlike the standard voicevox_speak tool which plays audio on the server, audio is played on the client side (in the browser/app) — no audio device needed on the server.
Features
- Client-side playback — Audio plays in Claude Desktop's chat, not on the server. Works even over remote connections.
- Play/Pause controls — Full playback controls embedded in the conversation
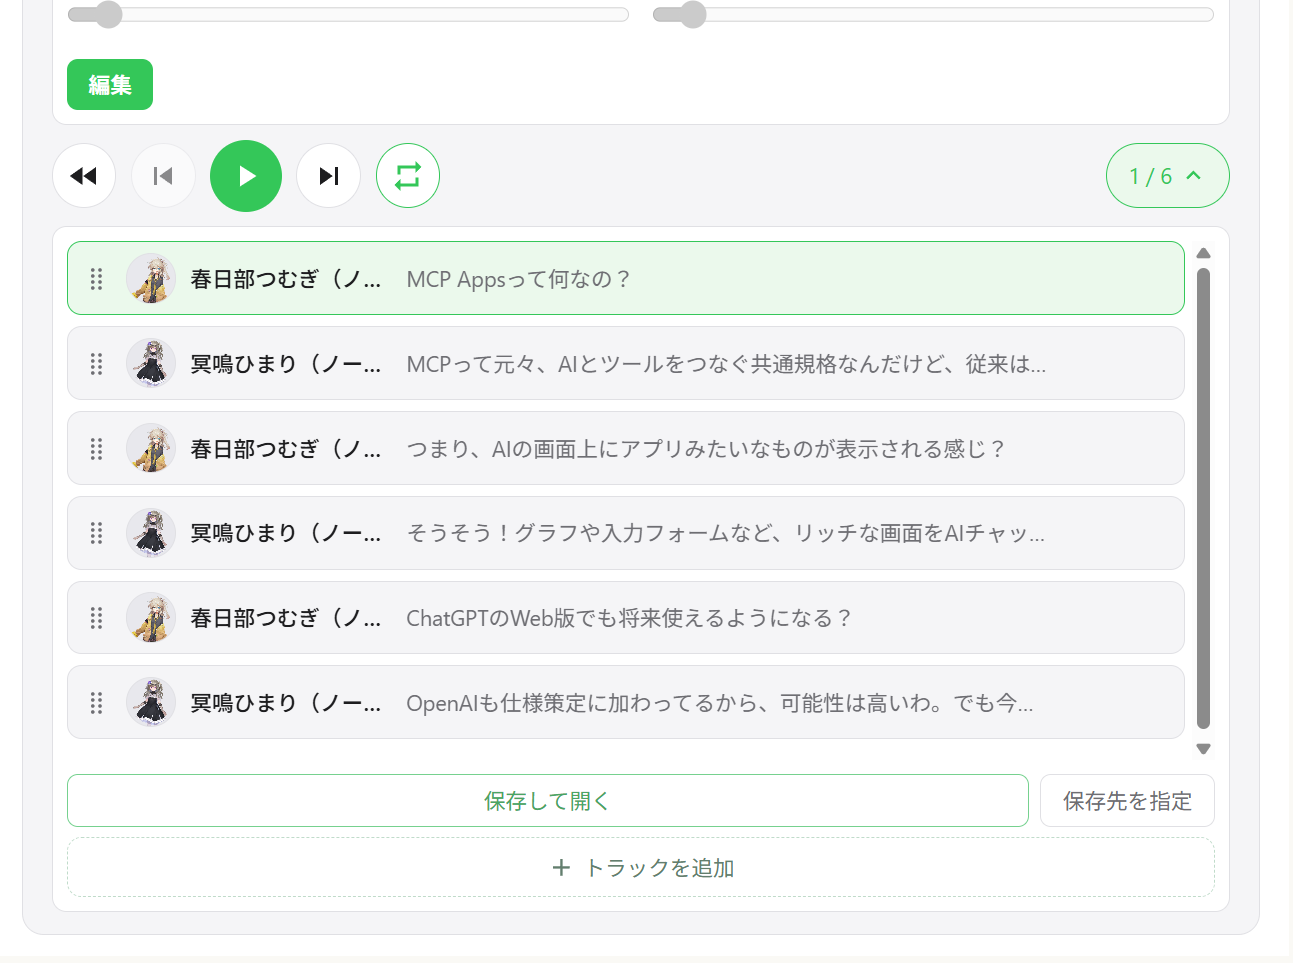
- Multi-speaker dialogue — Sequential playback of multiple speakers in one player with track navigation
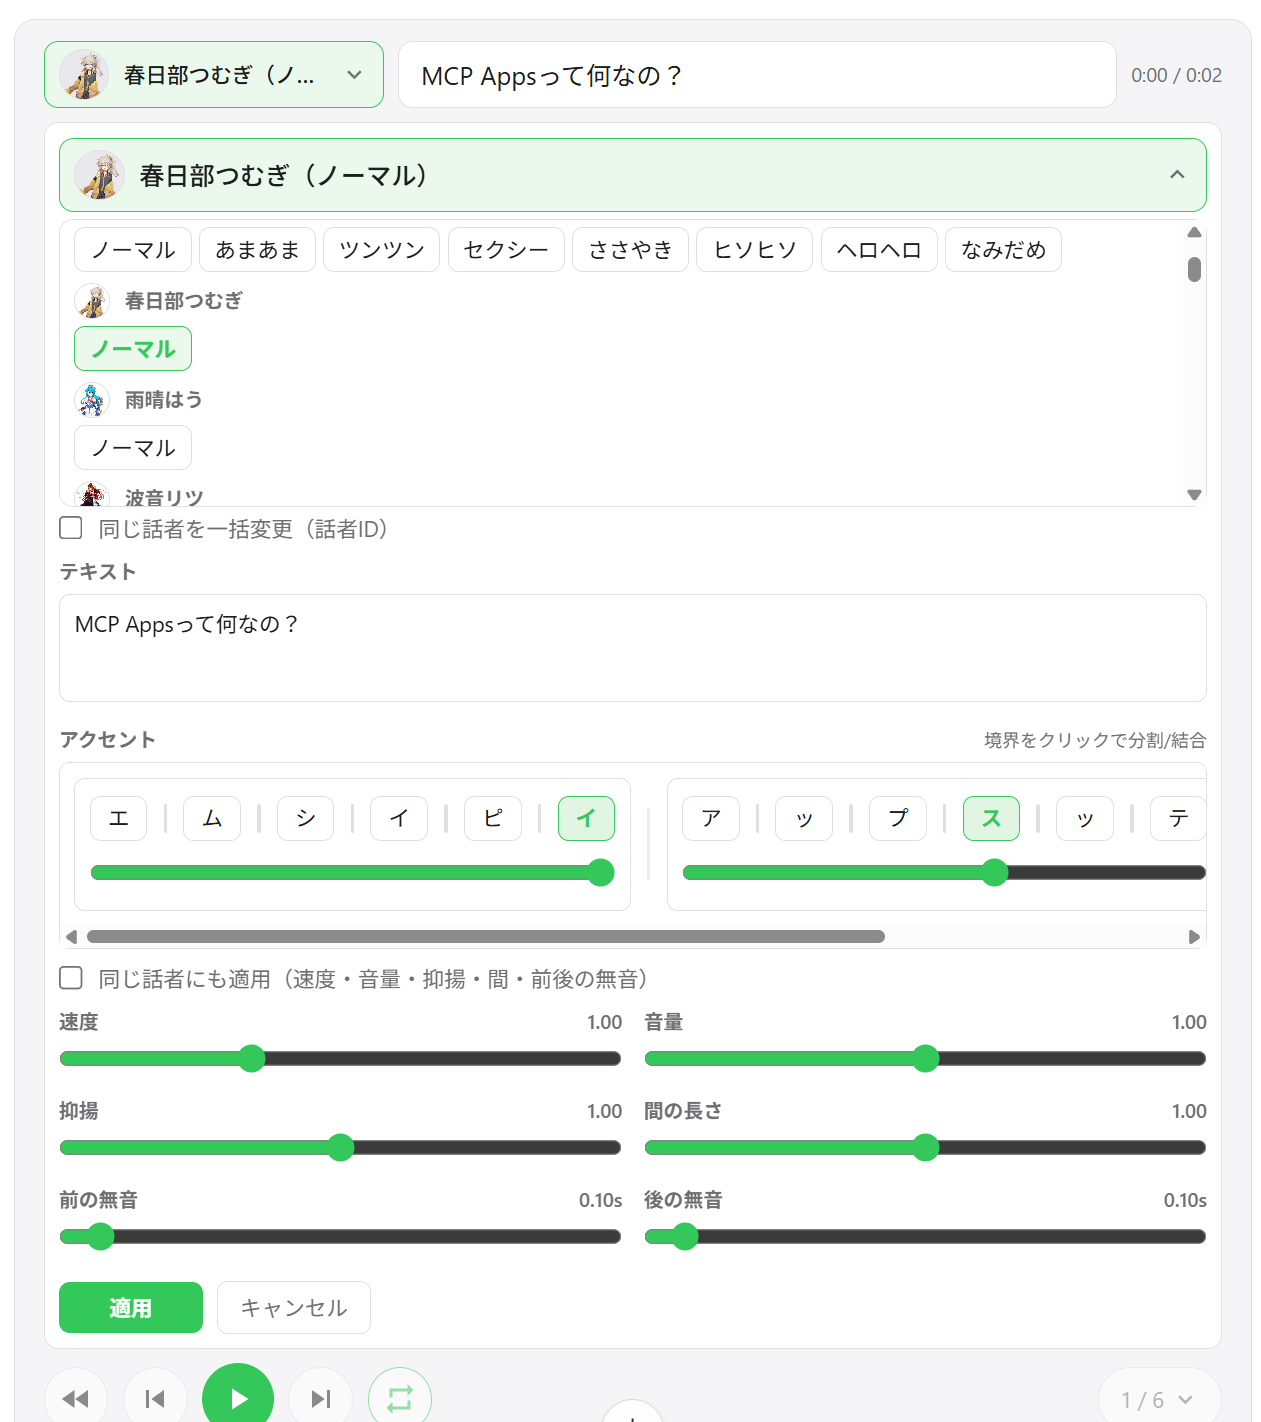
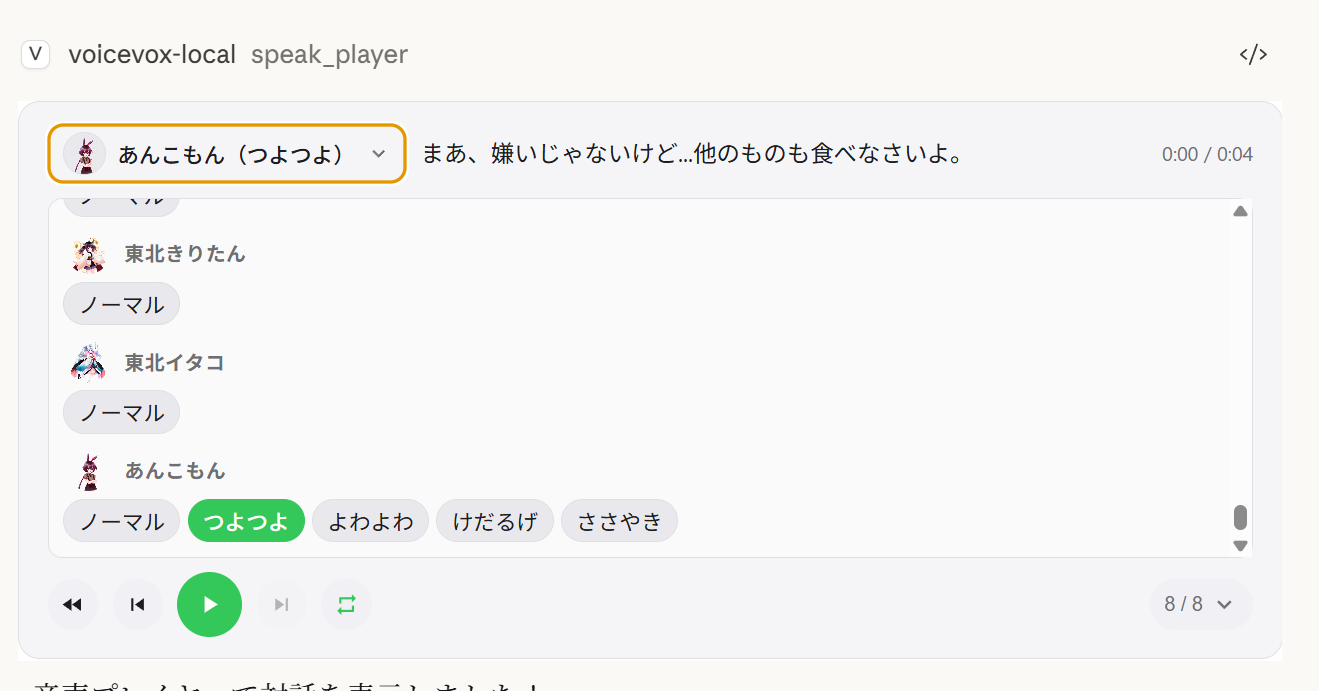
- Speaker switching — Change the voice of any segment directly from the player UI
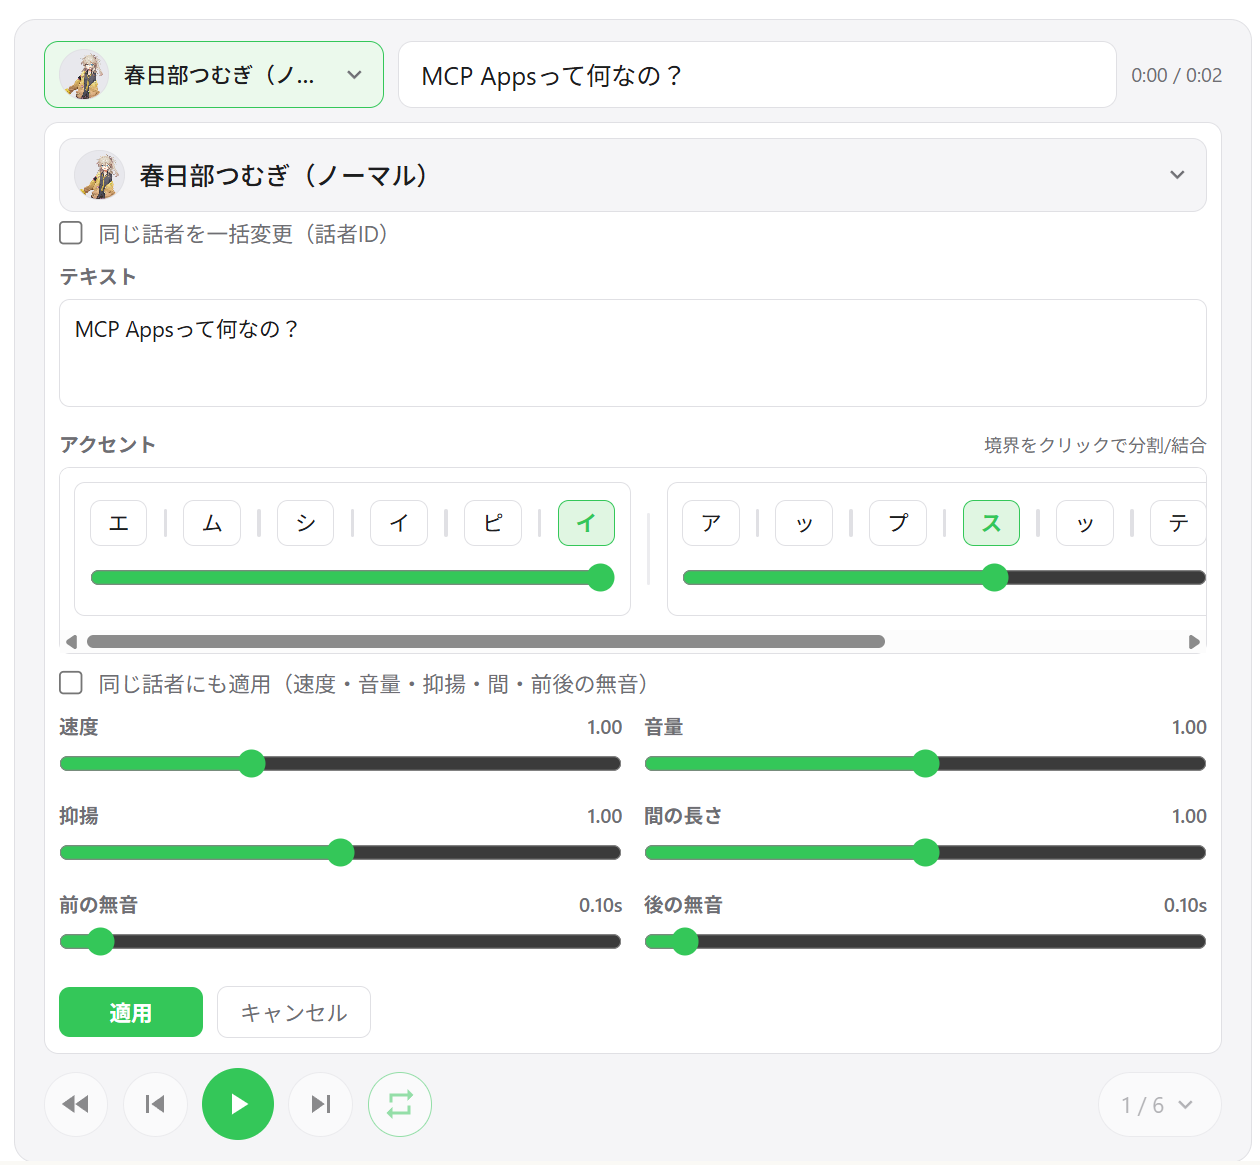
- Segment editing — Adjust speed, volume, intonation, pause length, and pre/post silence per segment
- Accent phrase editing — Edit accent positions and mora pitch directly in the UI
- Add / delete / reorder segments — Drag-and-drop track reordering; add new segments inline
- WAV export — Save all tracks as numbered WAV files and open the output folder automatically
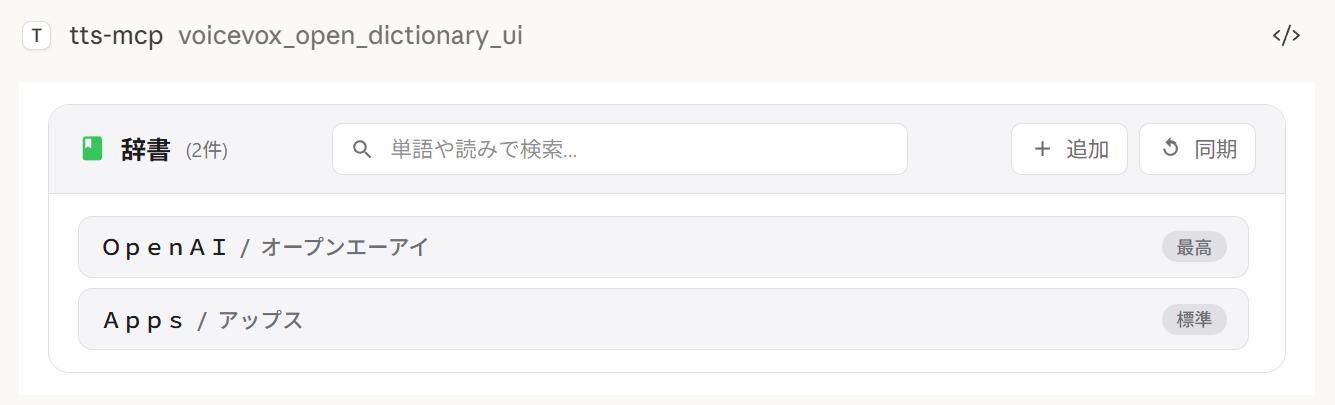
- User dictionary manager — Add, edit, and delete VOICEVOX user dictionary words with preview playback
- Cross-session state restore — Player state is persisted on the server; reopening the chat restores previous tracks
Export behavior by environment:
- Save and open always exports WAV files. If opening the file explorer is not supported, export still succeeds and the save path is shown in the UI.
- Choose output folder uses a native directory picker on Windows/macOS. On unsupported environments, this action falls back to the default export directory.
| Multi-speaker playback | Track list | Segment editing |
|:---:|:---:|:---:|
|  |
|  |
|  |
|
| Speaker selection | Dictionary manager | WAV export |
|:---:|:---:|:---:|
|  |
|  |
|  |
|
Supported Clients
| Client | Connection | Notes |
|--------|-----------|-------|
| ChatGPT | HTTP (remote) | Requires VOICEVOX_PLAYER_DOMAIN |
| Claude Desktop | stdio (local) | Works out of the box |
| Claude Desktop | HTTP (via mcp-remote) | Do not set VOICEVOX_PLAYER_DOMAIN |
> Note: speak_player requires a host that supports MCP Apps. In hosts without MCP Apps support, the tool is not available and speak (server-side playback) can be used instead.
Player MCP Tools
| Tool | Description |
|------|-------------|
| speak_player | Create a new player session and display the UI. Returns viewUUID. |
| resynthesize_player | Update all segments for an existing player (new viewUUID each call). |
| get_player_state | Read the current player state (paginated) for AI tuning. |
| open_dictionary_ui | Open the user dictionary manager UI. |
Quick Start
Requirements
- Node.js 20.0.0 or higher (or Bun) or Docker
- VOICEVOX Engine (must be running; included in Docker Compose)
- ffplay (optional, recommended — not needed with Docker)
Installing FFplay
ffplay is a lightweight player included with FFmpeg that supports playback from stdin. When available, it automatically enables low-latency streaming playback.
> 💡 FFplay is optional. Without it, playback falls back to temp file-based playback (Windows: PowerShell, macOS: afplay, Linux: aplay, etc.).
- Easy setup: One-liner installation for each OS (see steps below)
- Required: ffplay must be in PATH (restart terminal/apps after installation)
<details>
<summary>FFplay Installation and PATH Setup</summary>
Installation examples:
- Windows (any of these)
- Winget: winget install --id=Gyan.FFmpeg -e
- Chocolatey: choco install ffmpeg
- Scoop: scoop install ffmpeg
- Official builds: Download from https://www.gyan.dev/ffmpeg/builds/ or https://github.com/BtbN/FFmpeg-Builds and add the bin folder to PATH
- macOS
- Homebrew: brew install ffmpeg
- Linux
- Debian/Ubuntu: sudo apt-get update && sudo apt-get install -y ffmpeg
- Fedora: sudo dnf install -y ffmpeg
- Arch: sudo pacman -S ffmpeg
PATH Setup:
- Windows: Add ...\ffmpeg\bin to environment variables, then restart PowerShell/terminal and editor (Claude/VS Code, etc.)
- Verify: powershell -c "$env:Path" should include the ffmpeg path
- macOS/Linux: Usually auto-detected. Check with echo $PATH if needed, restart shell.
- MCP clients (Claude Desktop/Code): Restart the app to reload PATH.
Verification:
ffplay -version
If version info is displayed, installation is complete. CLI/MCP will automatically detect ffplay and use stdin streaming playback.
</details>
3 Steps to Get Started
1. Start VOICEVOX Engine
2. Add to Claude Desktop config file
Config file location:
- Windows: %APPDATA%\Claude\claude_desktop_config.json
- macOS: ~/Library/Application Support/Claude/claude_desktop_config.json
{
  "mcpServers": {
    "tts-mcp": {
      "command": "npx",
      "args": ["-y", "@kajidog/mcp-tts-voicevox"]
    }
  }
}
> 💡 If using Bun, just replace npx with bunx:
>
> "command": "bunx", "args": ["@kajidog/mcp-tts-voicevox"]

>
3. Restart Claude Desktop
That's it! Ask Claude to "say hello" and it will speak!
Quick Start with Docker
You can run both the MCP server and VOICEVOX Engine with a single command using Docker Compose. No Node.js or VOICEVOX installation required.
1. Start the containers
docker compose up -d
This starts the VOICEVOX Engine and the MCP server (HTTP mode on port 3000).
2. Add to Claude Desktop config file (using mcp-remote)
{
  "mcpServers": {
    "tts-mcp": {
      "command": "npx",
      "args": ["-y", "mcp-remote", "http://localhost:3000/mcp"]
    }
  }
}
3. Restart Claude Desktop
> Limitations (Docker): The Docker container has no audio device, so the voicevox_speak tool (server-side playback) is disabled by default. Use voicevox_speak_player instead — it plays audio on the client side (in Claude Desktop) and works without any audio device on the server. See UI Audio Player for details.
---
MCP Tools
voicevox_speak — Text-to-Speech
The main feature callable from Claude.
| Parameter | Description | Default |
|-----------|-------------|---------|
| text | Text to speak (multiple segments separated by newlines) | Required |
| speaker | Speaker ID | 1 |
| speedScale | Playback speed | 1.0 |
| immediate | Immediate playback (clears queue) | true |
| waitForEnd | Wait for playback completion | false |
Examples:
```javascript
// Simple text
{ "text": "Hello" }
// Specify speaker
{ "text": "Hello", "speaker": 3 }
// Different speakers per segment
{ "text": "1:Hello\n3:Nice weather today" }
…
Sign in to leave a review
Use Google, GitHub, or an email account so ratings stay tied to real people.
No reviews posted yet.