
Azure AI Agent Service + Azure AI Search MCP Server
Description
# Azure AI Agent Service + Azure AI Search MCP Server A Model Context Protocol (MCP) server that enables Claude Desktop to search your content using Azure AI services. Choose between Azure AI Agent Service (with both document search and web search) or direct Azure AI Search…
About
# Azure AI Agent Service + Azure AI Search MCP Server A Model Context Protocol (MCP) server that enables Claude Desktop to search your content using Azure AI services. Choose between Azure AI Agent Service (with both document search and web search) or direct Azure AI Search integration.  --- ##…
Details
- Author
- pekotidev
- Downloads
- 212
- Categories
- AI, Search
Jump to
- AI-enhanced search using Azure AI Agent Service
- Search both private documents and the public web
- Web search results include source citations
- Choose between Agent Service or direct Azure AI Search integration
- Seamless access through Claude Desktop's interface
- Customizable via decorators and tool instructions

Setting up with Highlight
This MCP is not yet compatible with Highlight’s one-click setup. However, you can still use it with Highlight by following these steps:
- Download and install Highlight from highlightai.com/download
- Navigate to the plugins tab and select "Add Custom Plugin"
-
Configure the plugin with the settings below
Plugin Name
Azure AI Agent Service + Azure AI Search MCP ServerCommand (node, npx, python, etc.)Please refer to the README for specific instructions on how to obtain API keys or other required environment variables.
- Enable "Start Automatically" if you want the plugin to start when Highlight launches





From the repository
Install Python 3.10+, set up a virtual environment with uv, install dependencies, create a .env file with Azure credentials, and configure Claude Desktop's mcpServers JSON with the appropriate script path and environment variables for your chosen implementation.
Claude Desktop / Cursor
Paste into your MCP client config file to install this server.
{
    "mcpServers": {
        "azure ai agent service + azure ai search mcp server": {
            "mcp-server-pekotidev": {
                "command": "uv",
                "args": [
                    "venv"
                ]
            }
        }
    }
}McpServers
{
    "mcp-server-pekotidev": {
        "command": "uv",
        "args": [
            "venv"
        ]
    }
}
Azure AI Agent Service + Azure AI Search MCP Server
A Model Context Protocol (MCP) server that enables Claude Desktop to search your content using Azure AI services. Choose between Azure AI Agent Service (with both document search and web search) or direct Azure AI Search integration.
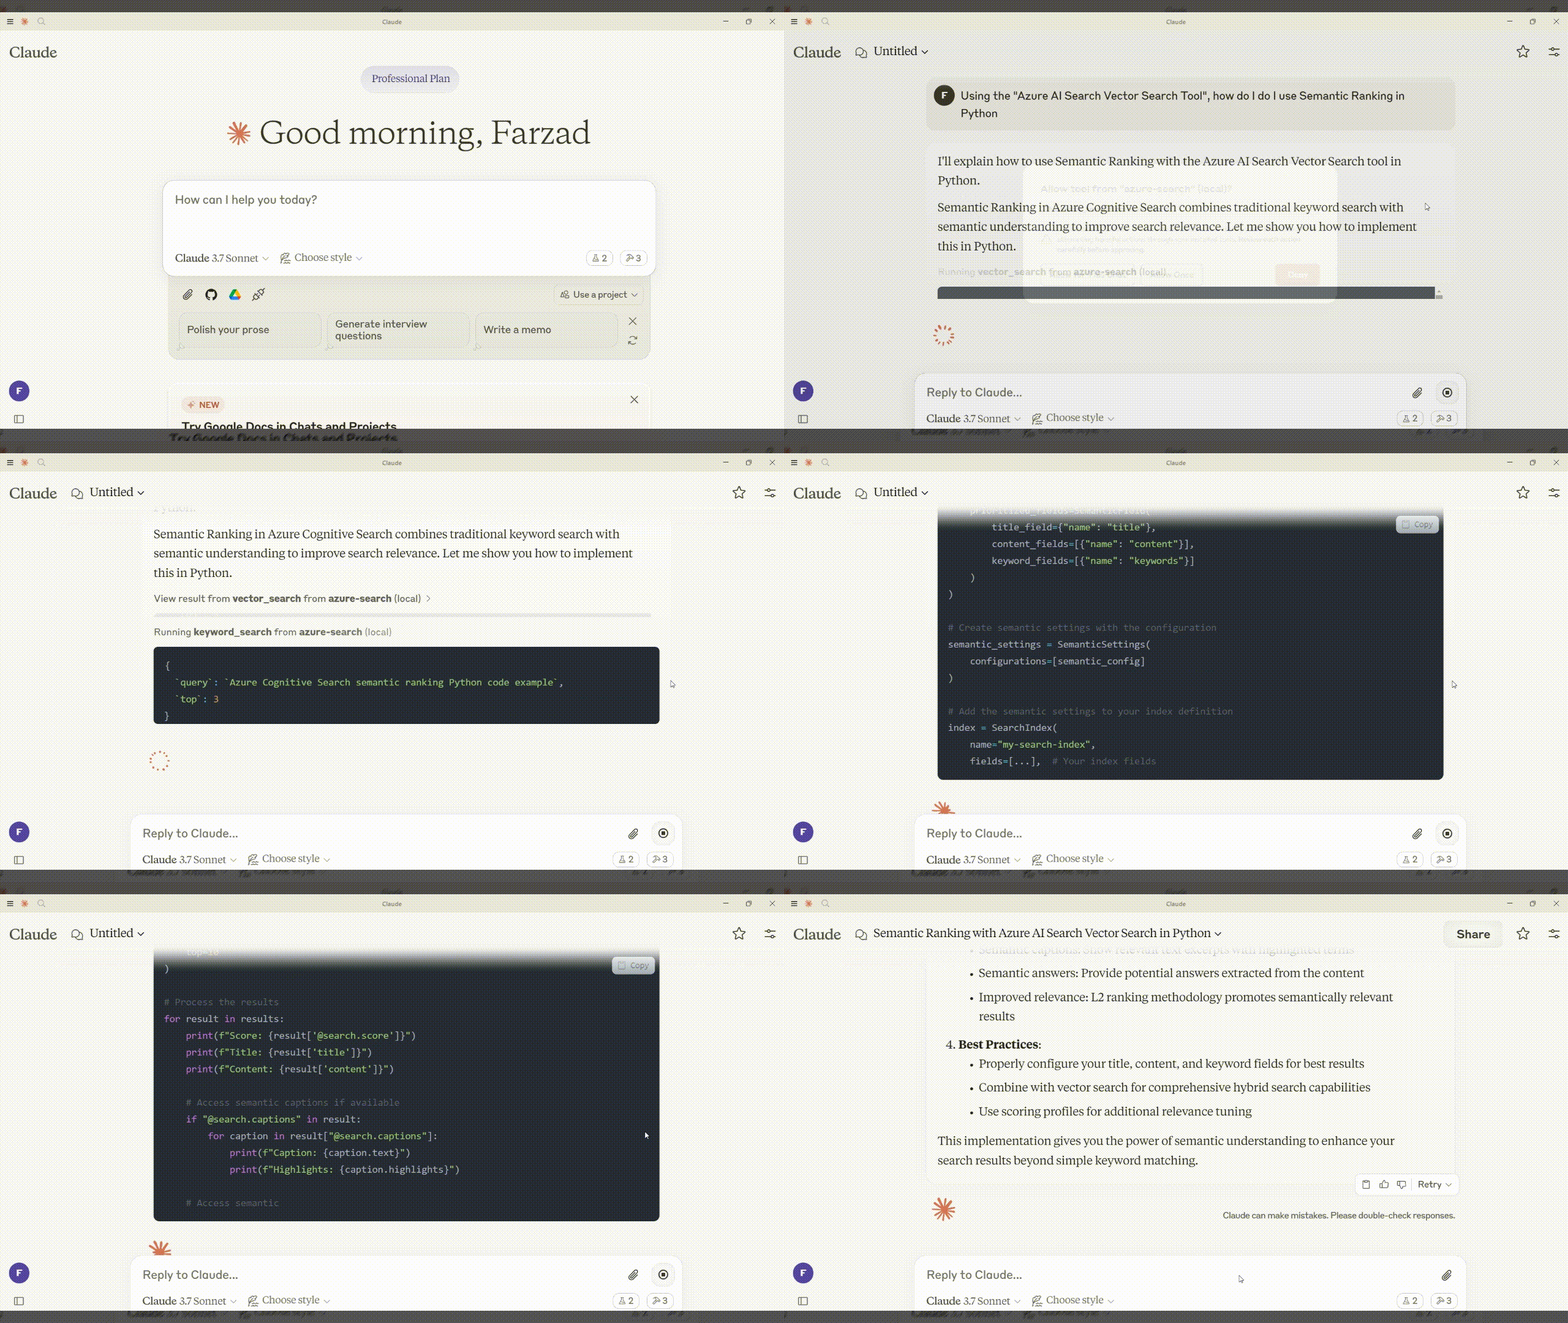
---
Overview
This project provides two MCP server implementations to connect Claude Desktop with Azure search capabilities:
1. Azure AI Agent Service Implementation (Recommended) - Uses the powerful Azure AI Agent Service to provide:
- Azure AI Search Tool - Search your indexed documents with AI-enhanced results
- Bing Web Grounding Tool - Search the web with source citations
2. Direct Azure AI Search Implementation - Connects directly to Azure AI Search with three methods:
- Keyword Search - Exact lexical matches
- Vector Search - Semantic similarity using embeddings
- Hybrid Search - Combination of keyword and vector searches
---
Features
- AI-Enhanced Search - Azure AI Agent Service optimizes search results with intelligent processing
- Multiple Data Sources - Search both your private documents and the public web
- Source Citations - Web search results include citations to original sources
- Flexible Implementation - Choose between Azure AI Agent Service or direct Azure AI Search integration
- Seamless Claude Integration - All search capabilities accessible through Claude Desktop's interface
- Customizable - Easy to extend or modify search behavior
---
Quick Links
- Get Started with Azure AI Search
- Azure AI Agent Service Quickstart
---
Requirements
- Python: Version 3.10 or higher
- Claude Desktop: Latest version
- Azure Resources:
- Azure AI Search service with an index containing vectorized text data
- For Agent Service: Azure AI Project with Azure AI Search and Bing connections
- Operating System: Windows or macOS (instructions provided for Windows, but adaptable)
---
Azure AI Agent Service Implementation (Recommended)
Setup Guide
1. Project Directory:
   mkdir mcp-server-azure-ai-search
   cd mcp-server-azure-ai-search
2. Create a .env File:
   echo "PROJECT_CONNECTION_STRING=your-project-connection-string" > .env
   echo "MODEL_DEPLOYMENT_NAME=your-model-deployment-name" >> .env
   echo "AI_SEARCH_CONNECTION_NAME=your-search-connection-name" >> .env
   echo "BING_CONNECTION_NAME=your-bing-connection-name" >> .env
   echo "AI_SEARCH_INDEX_NAME=your-index-name" >> .env
3. Set Up Virtual Environment:
   uv venv
   .venv\Scripts\activate
   uv pip install "mcp[cli]" azure-identity python-dotenv azure-ai-projects
4. Use the azure_ai_agent_service_server.py script for integration with Azure AI Agent Service.
Azure AI Agent Service Setup
Before using the implementation, you need to:
1. Create an Azure AI Project:
- Go to the Azure Portal and create a new Azure AI Project
- Note the project connection string and model deployment name
2. Create an Azure AI Search Connection:
- In your Azure AI Project, add a connection to your Azure AI Search service
- Note the connection name and index name
3. Create a Bing Web Search Connection:
- In your Azure AI Project, add a connection to Bing Search service
- Note the connection name
4. Authenticate with Azure:
az login
Configuring Claude Desktop
{
  "mcpServers": {
    "azure-ai-agent": {
      "command": "C:\\path\\to\\.venv\\Scripts\\python.exe",
      "args": ["C:\\path\\to\\azure_ai_agent_service_server.py"],
      "env": {
        "PROJECT_CONNECTION_STRING": "your-project-connection-string",
        "MODEL_DEPLOYMENT_NAME": "your-model-deployment-name",
        "AI_SEARCH_CONNECTION_NAME": "your-search-connection-name",
        "BING_CONNECTION_NAME": "your-bing-connection-name",
        "AI_SEARCH_INDEX_NAME": "your-index-name"
      }
    }
  }
}
> Note: Replace path placeholders with your actual project paths.
---
Direct Azure AI Search Implementation
For those who prefer direct Azure AI Search integration without the Agent Service:
1. Create a different .env File:
   echo "AZURE_SEARCH_SERVICE_ENDPOINT=https://your-service-name.search.windows.net" > .env
   echo "AZURE_SEARCH_INDEX_NAME=your-index-name" >> .env
   echo "AZURE_SEARCH_API_KEY=your-api-key" >> .env
2. Install Dependencies:
uv pip install "mcp[cli]" azure-search-documents==11.5.2 azure-identity python-dotenv
3. Use the azure_search_server.py script for direct integration with Azure AI Search.
4. Configure Claude Desktop:
   {
     "mcpServers": {
       "azure-search": {
         "command": "C:\\path\\to\\.venv\\Scripts\\python.exe",
         "args": ["C:\\path\\to\\azure_search_server.py"],
         "env": {
           "AZURE_SEARCH_SERVICE_ENDPOINT": "https://your-service-name.search.windows.net",
           "AZURE_SEARCH_INDEX_NAME": "your-index-name",
           "AZURE_SEARCH_API_KEY": "your-api-key"
         }
       }
     }
   }
---
Testing the Server
1. Restart Claude Desktop to load the new configuration
2. Look for the MCP tools icon (hammer icon) in the bottom-right of the input field
3. Try queries such as:
- "Search for information about AI in my Azure Search index"
- "Search the web for the latest developments in LLMs"
- "Find information about neural networks using hybrid search"
---
Troubleshooting
- Server Not Appearing:
- Check Claude Desktop logs (located at %APPDATA%\Claude\logs\mcp*.log on Windows)
- Verify file paths and environment variables in the configuration
- Test running the server directly: python azure_ai_agent_service_server.py or uv run python azure_ai_agent_service_server.py
- Azure AI Agent Service Issues:
- Ensure your Azure AI Project is correctly configured
- Verify that connections exist and are properly configured
- Check your Azure authentication status
---
Customizing Your Server
- Modify Tool Instructions: Adjust the instructions provided to each agent to change how they process queries
- Add New Tools: Use the @mcp.tool() decorator to integrate additional tools
- Customize Response Formatting: Edit how responses are formatted and returned to Claude Desktop
- Adjust Web Search Parameters: Modify the web search tool to focus on specific domains
---
License
This project is licensed under the MIT License.
Sign in to leave a review
Use Google, GitHub, or an email account so ratings stay tied to real people.
No reviews posted yet.




