
FastMCP_Claude_Desktop
About
This server provides a quickstart example for integrating a custom MCP server with Claude Desktop, as demonstrated in the official MCP documentation. It guides users through installing the MCP package, running a Python server script (server.py), and configuring Claude Desktop to…
Details
- Author
- nuke66
- Downloads
- 332
- Categories
- AI
Jump to
- Quick integration with Claude Desktop via mcp install command.
- Manual configuration through claude_desktop_config.json.
- Supports custom Python server scripts (server.py).
- Built-in inspector tool for server testing and debugging.

Setting up with Highlight
This MCP is not yet compatible with Highlight’s one-click setup. However, you can still use it with Highlight by following these steps:
- Download and install Highlight from highlightai.com/download
- Navigate to the plugins tab and select "Add Custom Plugin"
-
Configure the plugin with the settings below
Plugin Name
FastMCP_Claude_DesktopCommand (node, npx, python, etc.)Please refer to the README for specific instructions on how to obtain API keys or other required environment variables.
- Enable "Start Automatically" if you want the plugin to start when Highlight launches





From the repository
Install the mcp package with pip install mcp. Run mcp install server.py to automatically add the server to the Claude Desktop config file (claude_desktop_config.json). Alternatively, manually edit the config file to include a command entry pointing to the MCP executable and your server script. Use mcp dev server.py to launch the MCP inspector for testing.
Claude Desktop / Cursor
Paste into your MCP client config file to install this server.
{
    "mcpServers": {
        "fastmcp_claude_desktop": {
            "filesystem": {
                "command": "npx",
                "args": [
                    "-y",
                    "@modelcontextprotocol/server-filesystem",
                    "C:\\Users\\Slade\\Downloads"
                ]
            },
            "Demo4": {
                "command": "C:\\Users\\Slade\\AppData\\Roaming\\Python\\Python310\\Scripts\\mcp",
                "args": [
                    "run",
                    "C:\\dev\\xFastMCP\\server.py"
                ]
            }
        }
    }
}McpServers
{
    "filesystem": {
        "command": "npx",
        "args": [
            "-y",
            "@modelcontextprotocol/server-filesystem",
            "C:\\Users\\Slade\\Downloads"
        ]
    },
    "Demo4": {
        "command": "C:\\Users\\Slade\\AppData\\Roaming\\Python\\Python310\\Scripts\\mcp",
        "args": [
            "run",
            "C:\\dev\\xFastMCP\\server.py"
        ]
    }
}
MCP playaround
https://modelcontextprotocol.io/quickstart/user
https://modelcontextprotocol.io/quickstart/server
pypi doco
https://pypi.org/project/mcp/
Create a config file for claude desktop. File -> Settings, Developer tab, then click Edit Config. This will create a config file call claude_desktop_config.json.
e.g. C:\Users\Slade\AppData\Roaming\Claude\claude_desktop_config.json
pip install mcp
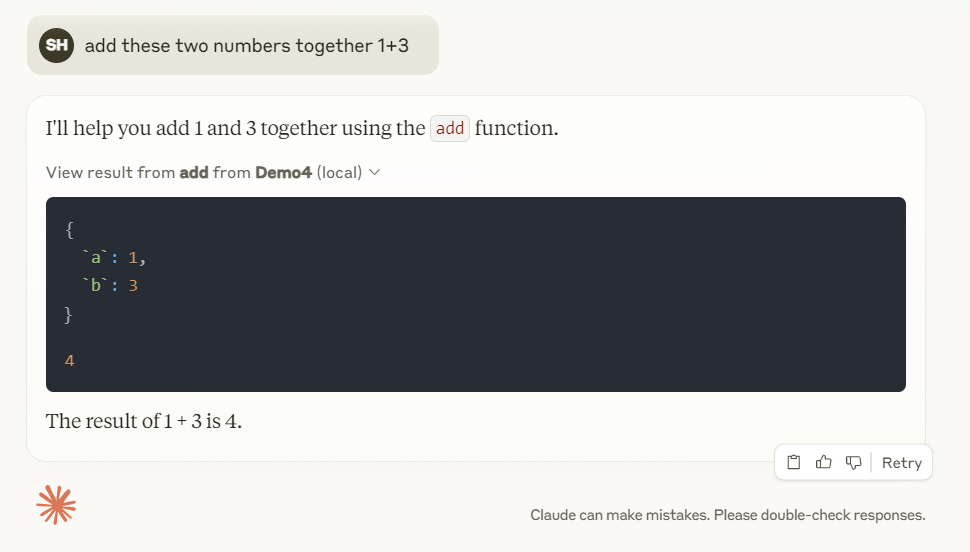
Run so available in Claude desktop, this will create an entry in claude_desktop_config.json
mcp install server.py
C:\Users\Slade\AppData\Roaming\Python\Python310\Scripts\mcp.exe install server.py
or use this config file (for non uv)
{
  "mcpServers": {
    "filesystem": {
      "command": "npx",
      "args": [
        "-y",
        "@modelcontextprotocol/server-filesystem",
        "C:\\Users\\Slade\\Downloads"
      ]
    },
    "Demo4": {
      "command": "C:\\Users\\Slade\\AppData\\Roaming\\Python\\Python310\\Scripts\\mcp",
      "args": [
          "run",
          "C:\\dev\\xFastMCP\\server.py"
      ]
    }
  }
}
Run inspector
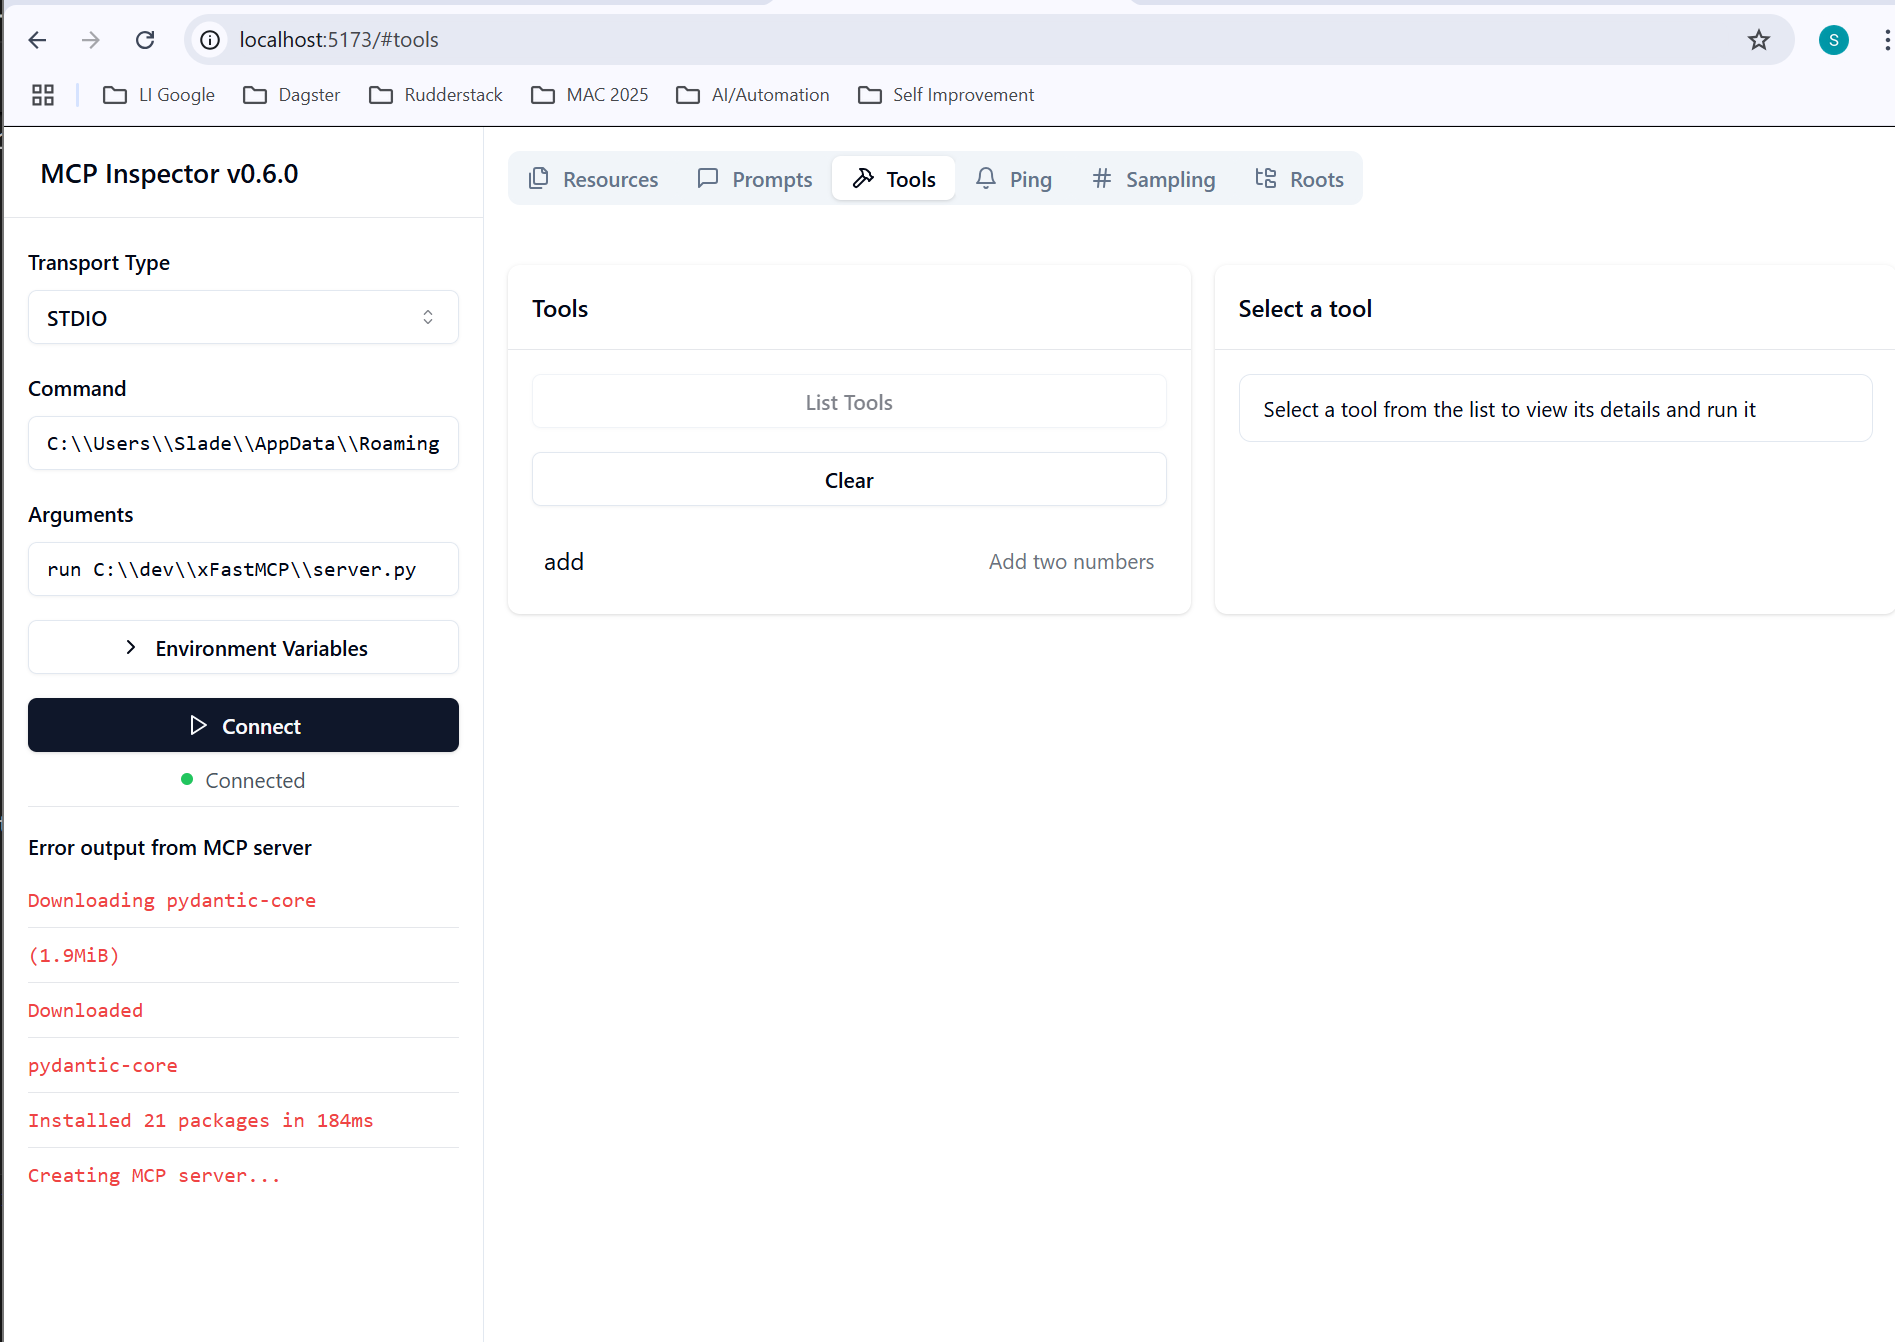
mcp dev server.py
C:\Users\Slade\AppData\Roaming\Python\Python310\Scripts\mcp.exe dev server.py
change LHS settings to match your working config from claude_desktop_config.json, e.g.
Command: C:\\Users\\Slade\\AppData\\Roaming\\Python\\Python310\\Scripts\\mcp
Arguments: run C:\\dev\\xFastMCP\\server.py
Sign in to leave a review
Use Google, GitHub, or an email account so ratings stay tied to real people.
No reviews posted yet.



